I’ll never forget the first time I tried to make a granny square. I thought I had it figured out—after all, how hard could it be? Four rounds, some chains, a few double crochets. Easy, right? Wrong. My “square” looked more like a wonky pentagon, the corners were pulling weird directions, and don’t even get me started on trying to join multiple squares together. The gaps between them could’ve housed a small family of mice.
Here’s the thing about granny squares that nobody tells you upfront: they’re deceptively simple-looking but require attention to detail that can make or break your entire project. I’ve spent years perfecting my granny square technique, and I’ve learned that the difference between a beautiful, lay-flat square and a puckered mess often comes down to understanding tension, proper corner construction, and knowing which crochet hook size works best with your chosen yarn.
The beauty of mastering the granny square lies in its versatility. Once you’ve got the basic technique down, you can create everything from cozy afghans to trendy tote bags. I’ve used granny squares for baby blankets, pot holders, even a funky vest that got more compliments than I expected. But before you can tackle those bigger projects, you need to nail the fundamentals.
Quick Answer
A traditional granny square uses double crochet clusters separated by chain-2 spaces, with chain-2 corners that create the square shape. Start with a magic ring, work 4 rounds minimum, and maintain consistent tension for even edges that lay flat.
Basic Granny Square Pattern
The traditional granny square follows a simple but specific structure that creates those characteristic corner spaces and cluster groups. Each round builds on the previous one, creating a square that should measure the same width and height when completed.
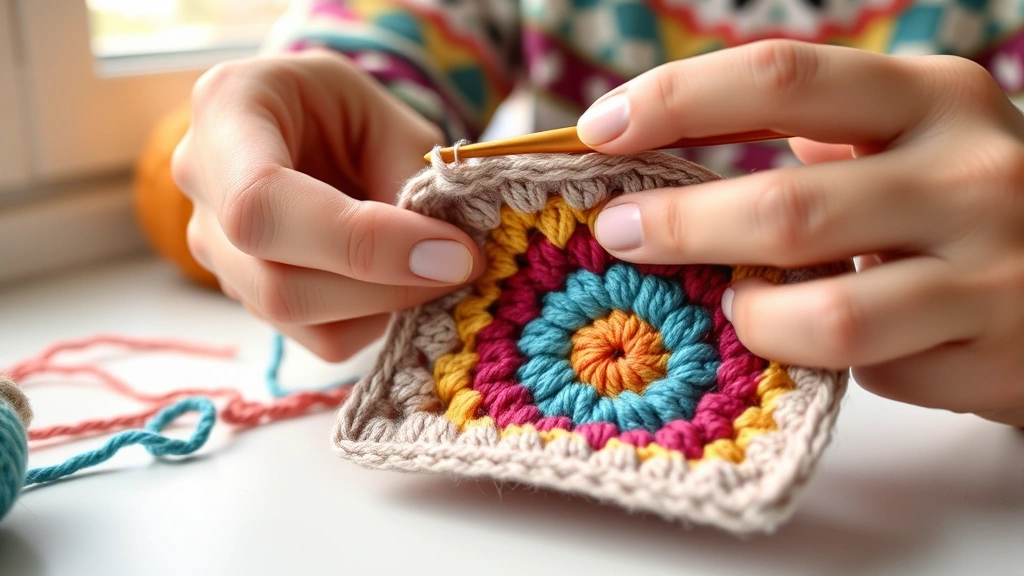
The foundation of every granny square is the center ring, followed by rounds that alternate between cluster groups and corner spaces. Here’s what makes it work: three double crochets worked together (called a cluster), separated by chain-2 spaces, with chain-2 corners that allow the square to lay flat.
Pro Tip: Count your clusters, not your individual stitches. Each side of a completed granny square should have the same number of cluster groups, with corners clearly defined by larger chain spaces.
The math is actually quite elegant. Round 1 creates 4 corner spaces. Round 2 adds clusters between corners. Round 3 adds more clusters, and so on. By Round 4, you’ll have a proper square that measures approximately 3-4 inches with worsted weight yarn and a size H (5mm) hook.
Essential Stitch Abbreviations
- ch: chain
- sl st: slip stitch
- dc: double crochet
- sp: space
- 3-dc cluster: 3 double crochets worked in the same space

Choosing the Right Materials
Your yarn choice dramatically affects how your granny squares turn out. I’ve learned this the hard way after making squares that were too stiff, too floppy, or just plain difficult to work with.
For beginners, I always recommend starting with worsted weight yarn (Category 4). Lion Brand Vanna’s Choice or Red Heart Super Saver work beautifully and won’t break the bank while you’re learning. These yarns have good stitch definition, so you can easily see your clusters and spaces.
| Yarn Weight | Hook Size | Square Size (4 rounds) | Best For |
|---|---|---|---|
| DK (3) | G/6 (4mm) | 2.5-3 inches | Baby items, delicate projects |
| Worsted (4) | H/8 (5mm) | 3-4 inches | Afghans, bags, most projects |
| Chunky (5) | J/10 (6mm) | 4-5 inches | Quick blankets, winter accessories |
Hook size matters more than you might think. Going up a hook size creates looser, more drapey squares—perfect for blankets. Going down creates tighter, more structured squares that work well for bags or pot holders. I keep multiple hook sizes handy when working on granny square projects.
Yarn Shopping Tip: Buy an extra skein or two beyond what your pattern calls for. Dye lots can vary, and you don’t want to be stuck with squares that don’t quite match.
Cotton yarns like Lion Brand 24/7 Cotton create crisp, defined squares that hold their shape beautifully. Acrylic blends offer easy care and consistent results. Avoid slippery yarns like bamboo or silk until you’ve mastered the basic technique—they can be tricky to maintain even tension with.
Round-by-Round Instructions
Let me walk you through each round of a basic 4-round granny square. I’ll include the stitch counts so you can check your work as you go.
Round 1: The Foundation
- Create the center ring
Make a magic ring or chain 4 and join with slip stitch to form a ring. The magic ring creates a tighter center, but either method works.
- First corner group
Chain 3 (counts as first dc), work 2 more dc in ring, chain 2. This creates your first corner.
- Complete the round
*Work 3 dc in ring, chain 2* three more times. Join with slip stitch to top of beginning chain-3. You should have 4 corner groups with 4 chain-2 spaces.
Round 2: Adding the Sides
This round creates the first “sides” of your square by working clusters in corner spaces and adding clusters between corners.
- Start in corner space
Slip stitch to first chain-2 space. Chain 3, work 2 dc in same space, chain 2, work 3 dc in same space. This creates a corner.
- Work the sides
Chain 1, work 3 dc in next chain-2 space, chain 1. This creates a side cluster.
- Continue around
*Work corner in next chain-2 space (3 dc, ch 2, 3 dc), chain 1, work 3 dc in next chain-2 space, chain 1* three more times. Join and fasten off if changing colors.
Round 3: Building the Square
Now you’ll see the square shape really start to emerge. Each side will have 2 cluster groups plus corners.
Count check: After Round 3, each side should have 2 cluster groups between corners, and your square should measure about 2.5-3 inches with worsted weight yarn.
Round 4: Completing the Basic Square
The fourth round gives you a substantial square that’s perfect for joining. Each side will have 3 cluster groups between corners, creating that classic granny square look.
By this point, you should be getting comfortable with the rhythm: corner spaces get the (3 dc, ch 2, 3 dc) treatment, while regular spaces get 3 dc clusters separated by chain-1 spaces.
Common Problems and Solutions
I’ve made every granny square mistake in the book, so let me save you some frustration by addressing the issues I see most often.
Squares That Won’t Lay Flat
This is usually a tension issue. If your squares are cupping (edges curling up), your tension is too tight. Try going up a hook size or consciously loosening your grip. If they’re ruffling (edges wavy), your tension is too loose—go down a hook size or tighten up slightly.
Another culprit? Inconsistent corner spacing. Those chain-2 corners are crucial. Make them too small (chain-1) and your square will cup. Make them too big (chain-3 or more) and you’ll get weird gaps and distortion.
Uneven Squares
When your squares look more like rectangles or wonky shapes, it’s usually because you’re not maintaining consistent cluster placement. Each side should have the same number of clusters. I count as I go: “Corner, cluster, cluster, corner” for a 4-round square.
Blocking Tip: Even perfect squares benefit from light blocking. Pin them to measurements on a blocking mat and lightly steam or spritz with water. This helps them hold their shape better when joined.
Joining Issues
If your squares don’t fit together properly when joining, check that they’re all the same size. Measure each square—they should be identical. Inconsistent hook sizes, yarn weights, or tension between squares will cause joining headaches.
Popular Granny Square Variations
Once you’ve mastered the basic granny square, there’s a whole world of variations to explore. These aren’t just different colors—they’re structural changes that create entirely different looks.
Solid Granny Square
Instead of the traditional open spaces, this version fills in the gaps with additional double crochets. It creates a denser, warmer fabric that’s perfect for winter blankets. You’ll use more yarn, but the result is cozy and substantial.
Granny Stripe
This variation creates rectangles instead of squares by continuing to add length to two opposite sides. It’s perfect for making scarves or table runners without having to join multiple pieces.
Circle in a Square
Starting with a circular center and transitioning to square corners in later rounds creates a beautiful medallion effect. It’s trickier than the basic version but creates stunning results, especially with color changes.
| Variation | Difficulty | Best Use | Yarn Usage |
|---|---|---|---|
| Basic Granny | Beginner | Blankets, bags | Moderate |
| Solid Granny | Beginner | Warm blankets | High |
| Circle in Square | Intermediate | Decorative pieces | Moderate |
| Granny Stripe | Beginner | Scarves, runners | Moderate |
Joining Multiple Squares
Making individual squares is just the beginning. The real magic happens when you join them into larger projects. I’ve tried every joining method out there, and each has its place.
Whip Stitch Method
This is my go-to for most projects. Hold two squares with right sides together and whip stitch through both loops of corresponding stitches. It creates a flat seam that’s nearly invisible from the right side.
Use the same yarn as your squares, or go one shade darker for seams that truly disappear. Work consistently—same number of stitches per side, same tension throughout.
Single Crochet Join
Place squares right sides together and single crochet through both layers. This creates a slightly raised seam that can be decorative if done in a contrasting color. It’s also very strong, making it perfect for items that will get heavy use like bags or floor cushions.
Join-as-You-Go Method
This technique joins squares during the final round of each square, eliminating separate seaming. It’s efficient but requires careful planning—you need to know your final layout before you start. I use this method for large blankets where seaming would be overwhelming.
Layout Tip: Before joining anything, lay out all your squares and take a photo. This becomes your roadmap and prevents mistakes when you’re deep into the joining process.
Project Ideas and Yarn Requirements
Granny squares are incredibly versatile. Here are some of my favorite projects with realistic yarn requirements and time estimates.
Baby Blanket (35″ x 45″)
You’ll need about 35-42 squares (5×7 or 6×7 layout). Using worsted weight yarn, plan on 1,200-1,400 yards total. This breaks down to roughly 3-4 skeins of Red Heart Super Saver or similar yarn.
Time estimate: 15-20 hours for a beginner, 10-12 hours for someone comfortable with the basic stitch. The joining takes about 3-4 additional hours.
Lap Afghan (45″ x 60″)
This requires 63-80 squares depending on your layout preference. You’re looking at 2,000-2,400 yards of yarn, or about 5-6 skeins of worsted weight. Consider using blanket yarn for extra softness and warmth.
Market Bag
A simple tote needs just 12-16 squares plus handles. One skein of worsted weight cotton is usually plenty. Cotton works best here because it’s sturdy and washable—perfect for a bag that might carry groceries or beach gear.
Pro tip for bags: Make your squares slightly smaller (3 rounds instead of 4) for better proportion and less bulk in the seams.
Pot Holders and Coasters
Single squares make perfect pot holders when worked in cotton yarn. Use a smaller hook than usual to create a tighter, more heat-resistant fabric. Four 3-round squares joined together create a larger pot holder that’s more practical for big pots and pans.
Common Questions
How many rounds should a granny square have?
There’s no magic number, but 4 rounds creates a square that’s about 3-4 inches with worsted weight yarn—perfect for most projects. Smaller items like coasters work well with 3 rounds, while larger decorative squares might go to 6 or 8 rounds. The key is consistency within your project.
Why do my granny squares curl at the edges?
Curling usually means your tension is too tight, especially in the corner chain-2 spaces. Try going up a hook size or consciously loosening your grip. Also check that you’re actually making chain-2 corners, not chain-1 or chain-3.
Can I use different yarn weights in the same project?
It’s tricky but possible. You’ll need to adjust hook sizes to make squares the same finished size. Generally, thicker yarns need bigger hooks, thinner yarns need smaller hooks. Test squares first to ensure they’ll block to the same measurements.
How much yarn do I need for a full-size afghan?
A typical throw (50″ x 60″) requires about 2,800-3,200 yards of worsted weight yarn. That’s roughly 7-8 skeins of most brands. Buy extra—running out of yarn mid-project is heartbreaking, especially if your dye lot is discontinued.
What’s the best way to change colors?
Fasten off the old color at the end of a round and join the new color in any stitch of the next round. This creates clean color transitions. For striped effects, change colors every round. For more complex patterns, plan your color changes before you start.
How do I fix a mistake several rounds back?
Unfortunately, you usually need to unravel back to the mistake. Crochet doesn’t allow for easy fixes like knitting does. Count your stitches frequently to catch mistakes early. If you’re just learning, consider using a light-colored yarn so you can see your stitches clearly.
Can granny squares be made in different shapes?
Absolutely! The same basic technique creates hexagons (6 corners instead of 4), triangles (3 corners), and even octagons. The principle is the same—clusters separated by chain spaces, with corner spaces that allow the shape to lay flat. Ravelry has thousands of variations to explore.
How do I keep track of my stitch count?
Use stitch markers to mark corners, or count clusters instead of individual stitches. Each side should have the same number of cluster groups. For complex projects, keep a notebook with your pattern and check off completed squares.
Mastering the granny square opens up a world of crochet possibilities. Yes, your first few squares might look a bit wonky—mine certainly did. But with practice, you’ll develop the muscle memory and eye for detail that creates beautiful, consistent squares every time.
The key is starting with good materials, maintaining consistent tension, and not being afraid to unravel and try again when something doesn’t look right. Every experienced crocheter has a pile of practice squares somewhere, and that’s perfectly normal.
Once you’ve got the basic technique down, experiment with colors, try different yarn weights, and explore the countless variations available. Granny squares never go out of style because they’re endlessly adaptable to your personal taste and skill level. Happy crocheting!