I’ll never forget the first time I tried to make a granny square blanket. I was so excited about the beautiful color combinations I’d seen on Pinterest, but when I started crocheting, my squares looked more like wonky rectangles. The corners were loose, the sides were uneven, and don’t even get me started on trying to join them together. Sound familiar?
After years of making granny squares (and plenty of mistakes along the way), I’ve learned that the secret isn’t just following a pattern—it’s understanding the fundamentals that make granny squares work. Whether you’re a complete beginner who’s never held a hook or someone who’s struggled with keeping squares actually square, this guide will walk you through everything you need to know.
The beauty of granny squares lies in their versatility. You can make them in any size, any color combination, and use them for everything from coasters to king-size blankets. But here’s what I wish someone had told me from the start: consistency is everything. Once you master the basic technique and understand how to maintain even tension, you’ll be cranking out perfect squares like a pro.
Quick Answer
A granny square starts with a magic ring, uses double crochet clusters separated by chain spaces, and grows outward in rounds. The key to perfect squares is maintaining consistent tension and counting your stitches carefully in each round.
Getting Started: Materials and Basic Setup
Let’s talk about what you actually need to make granny squares. The good news? You don’t need much, and you probably already have most of it if you’ve done any crocheting before.
Yarn Choice: I always recommend starting with worsted weight yarn (that’s weight 4 on the yarn label) because it’s forgiving and easy to see your stitches. Red Heart Super Saver is my go-to for practice squares—it’s affordable, comes in tons of colors, and holds up well to being frogged (that’s crochet speak for ripping out your work when you mess up).
For hook size, I use a 5.5mm (US size I) with worsted weight yarn. This creates a nice, even fabric that’s not too tight or too loose. If you’re working with double crochet stitches for the first time, this combination will give you plenty of room to see what you’re doing.
Essential supplies:
- Crochet hook (5.5mm/US I for worsted weight)
- Worsted weight yarn in 2-4 colors
- Scissors
- Tapestry needle for weaving in ends
- Stitch markers (optional but helpful)
Here’s something I learned the hard way: buy more yarn than you think you need. Nothing’s more frustrating than running out of a color halfway through a project, especially if it’s been discontinued. For a standard throw blanket made of 4-inch squares, you’ll need about 1,200-1,500 yards total.
Pro tip: Before you start your big project, make a few practice squares in different color combinations. This helps you get comfortable with the technique and lets you test how different colors look together.
Creating the Foundation Ring
The foundation of every granny square is the center ring, and there are two main ways to create it. I’m going to teach you both, but I’ll tell you upfront which one I prefer and why.
Method 1: Chain Ring
This is the traditional method that most patterns call for. You chain 4, then slip stitch into the first chain to form a ring. It’s simple and works well, but it can leave a small hole in the center of your square.
- Make a slip knot
Create a slip knot on your hook, leaving about a 6-inch tail.
- Chain 4
Make 4 chain stitches. These should be loose enough that you can easily work into them later.
- Join with slip stitch
Insert your hook into the first chain you made and slip stitch to form a ring.
Method 2: Magic Ring (My Preferred Method)
I almost always use a magic ring technique for granny squares because it creates a tighter, more professional-looking center. If you’ve never made a magic ring before, don’t worry—it’s easier than it looks once you get the hang of it.
The magic ring allows you to pull the center completely closed, which eliminates that little hole you sometimes get with the chain method. This is especially important if you’re making items like baby blankets where you don’t want little fingers getting caught.
Working the First Three Rounds
Now we’re getting to the meat of the granny square. The first three rounds establish the basic structure that you’ll repeat to make larger squares. I’m going to walk you through each round step by step, and I’ll share the little tricks that help me keep everything even.
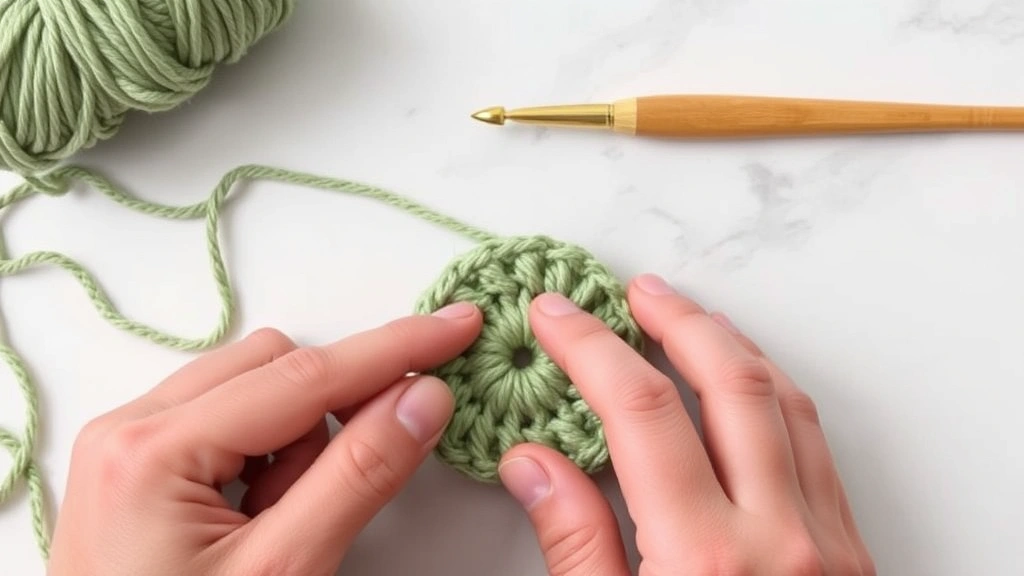
Round 1: Creating the Center
This round creates the foundation for everything that follows. You’ll work 12 double crochet stitches into your ring, then divide them into 4 groups of 3.
- Chain 3 (counts as first DC)
This chain-3 will count as your first double crochet throughout the pattern.
- Work 2 more DC into ring
You now have a cluster of 3 double crochets.
- Chain 2 for corner space
This creates the corner space that gives granny squares their characteristic look.
- Repeat the cluster pattern
*3 DC, chain 2* three more times. You’ll end with 4 clusters and 4 corner spaces.
- Join with slip stitch
Slip stitch into the top of your beginning chain-3.
At this point, you should have a small square with 4 distinct corners. If you’re using a magic ring, pull the tail to close the center completely.
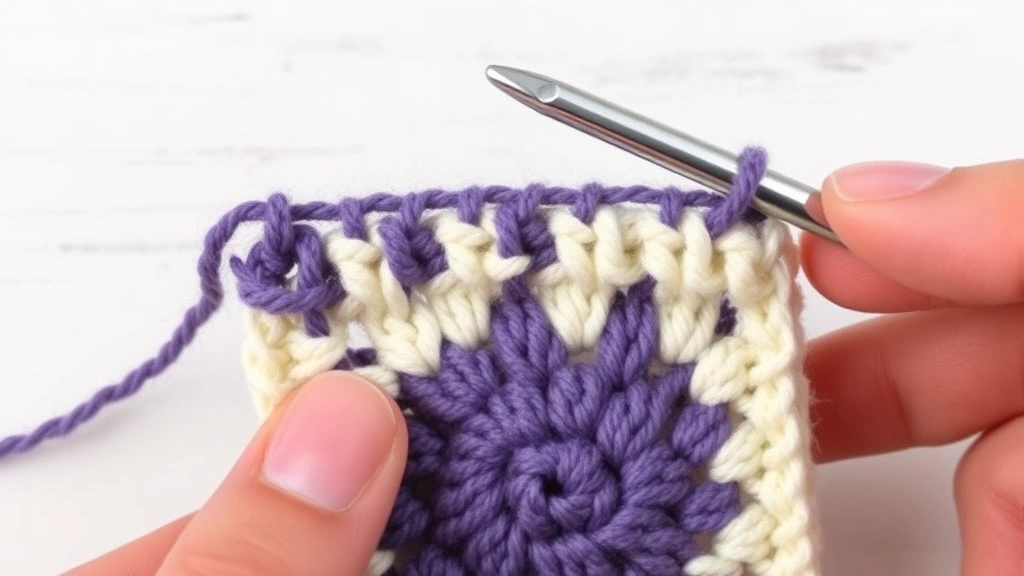
Round 2: Establishing the Square Shape
This is where your granny square really starts to look like a square. You’ll work into the corner spaces from Round 1 and add side clusters.
The key to this round is understanding where to place your stitches. You’ll work corner clusters into the chain-2 spaces from the previous round, and you’ll add clusters between the corners by working into the spaces between the 3-DC groups.
Here’s something that confused me for ages: when the pattern says “work into the space,” it means the gap between stitches, not through the actual stitches themselves. This creates the open, lacy look that granny squares are known for.
Round 3: Adding Width and Stability
Round 3 is where you start to see the classic granny square proportions emerge. You’ll continue the same pattern of corner clusters and side clusters, but now you’ll have two side clusters between each corner instead of one.
This is also where tension becomes really important. If your stitches are too tight, your square will cup. If they’re too loose, it’ll ruffle. I aim for stitches that are firm but not tight—you should be able to easily insert your hook under both loops of each stitch.
| Round | Corner Pattern | Side Clusters | Total Clusters |
|---|---|---|---|
| 1 | 3 DC, ch 2, 3 DC | 0 | 4 |
| 2 | 3 DC, ch 2, 3 DC | 1 between corners | 8 |
| 3 | 3 DC, ch 2, 3 DC | 2 between corners | 12 |
Keeping Your Squares Actually Square
This is probably the most common problem I see with new granny square makers: the squares end up as rectangles, diamonds, or just generally wonky shapes. The good news is that this is almost always fixable with a few simple adjustments.
Tension Troubleshooting
Consistent tension is the secret to perfect squares. I know it sounds boring, but it really makes all the difference. Here’s how to check if your tension is on track:
- Too tight: Your work curves inward (cupping). The fabric feels stiff and it’s hard to insert your hook.
- Too loose: Your work ruffles outward. The stitches look uneven and gaps are too large.
- Just right: Your square lies flat and the stitches are even. You can easily insert your hook but the fabric has good structure.
If you’re struggling with tension, try going up or down a hook size. I’ve found that many crocheters naturally crochet tighter when they’re concentrating hard (like when learning a new stitch), so don’t be afraid to size up your hook.
Counting and Placement
Here’s a trick that changed everything for me: I count my clusters as I go, not just my individual stitches. Each side of your square should have the same number of clusters, and each corner should look identical.
For basic crochet stitches, consistency in how you form each stitch is crucial. Make sure you’re always working under both loops of the stitch unless the pattern specifically tells you otherwise.
Adding Colors and Changing Yarn
One of the most fun parts of making granny squares is playing with color. You can create subtle gradients, bold contrasts, or even use up scraps of yarn in a rainbow effect. But changing colors properly is a skill that takes a little practice.
When to Change Colors
You can change colors at the beginning of any round, and this is usually the cleanest-looking option. Some crocheters like to change colors every round for a rainbow effect, while others prefer to work several rounds in the same color before switching.
Here’s my favorite color progression for a classic granny square: start with a dark center (navy, black, or deep purple), then move to a medium color for 2-3 rounds, and finish with a light color for the border. This creates a nice visual weight that draws the eye inward.
The Proper Way to Change Colors
This technique ensures clean color changes without loose ends or visible knots:
- Work until the last step of your final stitch
Stop when you have 2 loops on your hook (before completing the final yarn over and pull through).
- Drop the old color
Let the old yarn fall to the back of your work.
- Pick up the new color
Yarn over with the new color and pull through both loops to complete the stitch.
- Continue with new color
Your next chain or stitch will be in the new color.
When working with different yarn weights, you might need to adjust your hook size to maintain consistent gauge across color changes.
Don’t cut your yarn too short when changing colors. Leave at least 6 inches so you have enough to weave in securely later. I learned this lesson after having ends come loose in the wash!
Different Sizes and Variations
One of the best things about granny squares is how scalable they are. You can stop after 3 rounds for tiny coaster-sized squares, or keep going for 10+ rounds to make large afghan squares. Here’s how different sizes work out with worsted weight yarn and a 5.5mm hook:
| Rounds | Approximate Size | Best Uses | Yarn per Square |
|---|---|---|---|
| 3 | 2.5 inches | Coasters, baby items | 15-20 yards |
| 5 | 4 inches | Afghan squares, pillows | 35-45 yards |
| 7 | 5.5 inches | Large afghans, wall hangings | 60-75 yards |
| 10 | 8 inches | Mega squares, quick projects | 120-150 yards |
Adjusting for Different Yarn Weights
If you want to use a different yarn weight, you’ll need to adjust your hook size accordingly. Here’s what I recommend:
- DK weight (3): Use 4.5mm hook
- Worsted weight (4): Use 5.5mm hook
- Chunky weight (5): Use 6.5mm hook
Keep in mind that your finished square size will change with different yarn weights, even if you use the same number of rounds. This is actually great for creating interesting texture combinations in the same project.
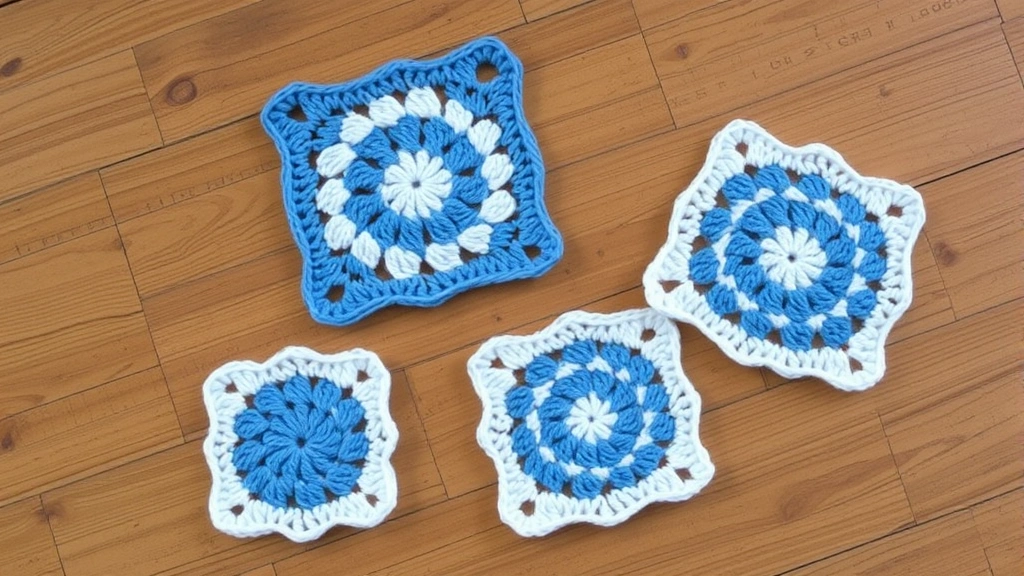
Creative Variations
Once you’re comfortable with the basic granny square, there are tons of fun variations to try. You can work single crochet rounds between double crochet rounds for a different texture, or try working in the back loops only for a ridged effect.
Some of my favorite variations include solid granny squares (where you fill in all the spaces), granny squares with different stitch patterns in each round, and even 3D granny squares with popcorn stitches or bobbles.
Common Problems and Solutions
Let me share some of the most common issues I see (and have definitely experienced myself) when making granny squares, along with practical solutions that actually work.
My Squares Are Curling or Cupping
This almost always means your tension is too tight. Try going up a hook size or consciously loosening your grip on the yarn. I know it feels counterintuitive, but looser stitches often look more professional in granny squares.
Another cause can be working into the wrong part of the stitch. Make sure you’re going under both loops of each stitch unless the pattern specifically says otherwise.
My Squares Are Ruffling
The opposite problem—your tension is too loose or you might be accidentally adding extra stitches. Count your clusters carefully and try going down a hook size.
My Corners Aren’t Square
This usually happens when the corner chain spaces are inconsistent. Make sure you’re always chaining 2 for corners (or whatever the pattern specifies) and that you’re working the same number of double crochets in each corner cluster.
I Keep Losing Track of Where I Am
Use stitch markers! Place them in your corner chain spaces at the beginning of each round. Also, try counting clusters instead of individual stitches—it’s much easier to keep track of.
My Yarn Ends Keep Coming Loose
You’re probably not weaving them in securely enough. When I weave in ends, I go through at least 4-5 stitches, change direction, and go through 4-5 more. For extra security on items that will be washed frequently, I tie a tiny knot before weaving in the end.
Working with the right hook size also helps create stitches that hold yarn ends more securely.
Frequently Asked Questions
How many granny squares do I need for a throw blanket?
For a standard throw (about 50″ x 60″), you’ll need approximately 120 squares if they’re 4 inches each, or about 80 squares if they’re 5 inches each. I always make a few extra because some might end up slightly different sizes, and it’s better to have extras than to run short.
Can I use different yarn weights in the same project?
Yes, but you’ll need to adjust your hook sizes to keep the squares the same finished size. I actually love mixing textures this way—try using a chunky yarn for some squares and worsted weight for others, adjusting hooks as needed to maintain consistent square size.
How do I join granny squares together?
There are several methods, but my favorites are the whip stitch (sewn with a tapestry needle) and the slip stitch join (crocheted). The whip stitch creates an invisible seam, while slip stitch joining creates a raised ridge that can be decorative. For joining techniques, consistency is key—use the same method throughout your project.
Why do my squares end up different sizes?
This is usually due to tension variations. Try to crochet at the same time of day when possible (I’m tighter in the morning, looser in the evening), and take breaks if you notice your tension changing. Also, make sure you’re using the same hook size for all squares.
How much yarn do I need for a full-size afghan?
For a queen-size afghan made with worsted weight yarn, plan on about 2,500-3,000 yards total. I always buy an extra skein of each color because dye lots can vary, and nothing’s worse than running out of yarn when you’re 90% done with a project.
Can I make granny squares with cotton yarn?
Absolutely! Cotton is actually great for granny squares, especially for items like dishcloths, summer tops, or baby blankets. Just keep in mind that cotton has less stretch than acrylic, so your tension might need to be slightly looser. I love using Lion Brand 24/7 Cotton for granny square projects.
How do I block granny squares?
Wet blocking works best for granny squares. Soak them in cool water with a little wool wash, gently squeeze out excess water (never wring), and pin them to measurements on a blocking board. This helps even out any tension issues and gives you perfectly square squares.
What’s the best way to carry yarn when changing colors frequently?
If you’re changing colors every round, don’t cut the yarn—just carry it up the side of your work. Twist the carried yarn with your working yarn every few rounds to keep it neat. This saves tons of ends to weave in later.
Ready to Start Your Granny Square Journey
Making granny squares is one of those skills that seems intimidating at first but becomes second nature with practice. I remember feeling overwhelmed by all the counting and stitch placement when I started, but now I can work a basic granny square while watching TV or chatting with friends.
The key is to start simple—pick two or three colors you love, grab some worsted weight yarn and a 5.5mm hook, and just start making squares. Don’t worry about making them perfect right away. Every wonky square teaches you something, and even experienced crocheters sometimes need to frog a square and start over.
Once you’ve mastered the basic technique, you’ll find yourself seeing granny square possibilities everywhere. That bag of yarn scraps? Perfect for a scrappy granny square blanket. Need a quick gift? A set of granny square coasters works up in an evening. Want to try a new color combination? Granny squares are the perfect low-commitment way to experiment.
Remember, crochet is supposed to be enjoyable, not stressful. If you’re getting frustrated, take a break and come back to it later. Sometimes that’s all it takes for everything to click. Happy crocheting!