You know that feeling when you’re halfway through a beautiful blanket project and suddenly realize you’re running low on yarn? Or worse, you finish the project only to discover you bought way too much and now have enough leftover yarn to make three more blankets? I’ve been there more times than I care to admit, and it’s honestly one of the most frustrating parts of crocheting.
Calculating yarn requirements isn’t just about avoiding waste or emergency trips to the craft store (though those are definitely perks). It’s about planning your projects with confidence, staying within budget, and actually finishing what you start. After years of overbuying, underestimating, and learning from my mistakes, I’ve developed a system that takes the guesswork out of yarn shopping.
The truth is, most patterns give you yarn amounts, but they’re often based on specific brands and weights that might not match what you want to use. Plus, if you’re designing your own projects or adjusting pattern sizes, you’re pretty much on your own. But here’s the thing – once you understand the basic principles behind yarn calculations, you’ll never have to stress about having enough yarn again.
Quick Answer
Calculate yarn needs by measuring your gauge swatch, determining total project area, and multiplying by yarn per square inch. Add 10-20% extra for mistakes and blocking. Most blankets need 1200-3000 yards depending on size and stitch pattern.
Understanding Yarn Calculation Basics
Before we dive into the math, let’s talk about why yarn calculations matter so much. When I first started crocheting, I’d just buy what looked like “enough” yarn, which usually meant either running out three-quarters through or ending up with enough leftover to stock a small craft store.
The foundation of any good yarn calculation is understanding yardage versus weight. A 100-gram skein of worsted weight yarn might contain anywhere from 180 to 220 yards depending on the fiber content and twist. Cotton tends to be heavier per yard than acrylic, while wool falls somewhere in between.
Here’s what I’ve learned about the key factors that affect how much yarn you’ll need:
- Yarn weight: Thicker yarns cover more area per yard but use more material per stitch
- Hook size: Larger hooks create looser stitches that use less yarn per square inch
- Stitch pattern: Dense stitches like single crochet use more yarn than open patterns
- Tension: Tight crocheters use more yarn than loose crocheters
- Fiber content: Some fibers have more loft and coverage than others
The most reliable method I’ve found is the gauge swatch approach. Yes, I know swatching isn’t the most exciting part of crocheting, but it’s absolutely worth the time investment. A 4-inch square swatch will tell you everything you need to know about how your yarn and hook combination will behave in the actual project.
Pro Tip: Always make your gauge swatch in the same stitch pattern you’ll use for your project. A single crochet swatch won’t help you calculate yarn needs for a granny square blanket.
Measuring Your Gauge and Yarn Usage
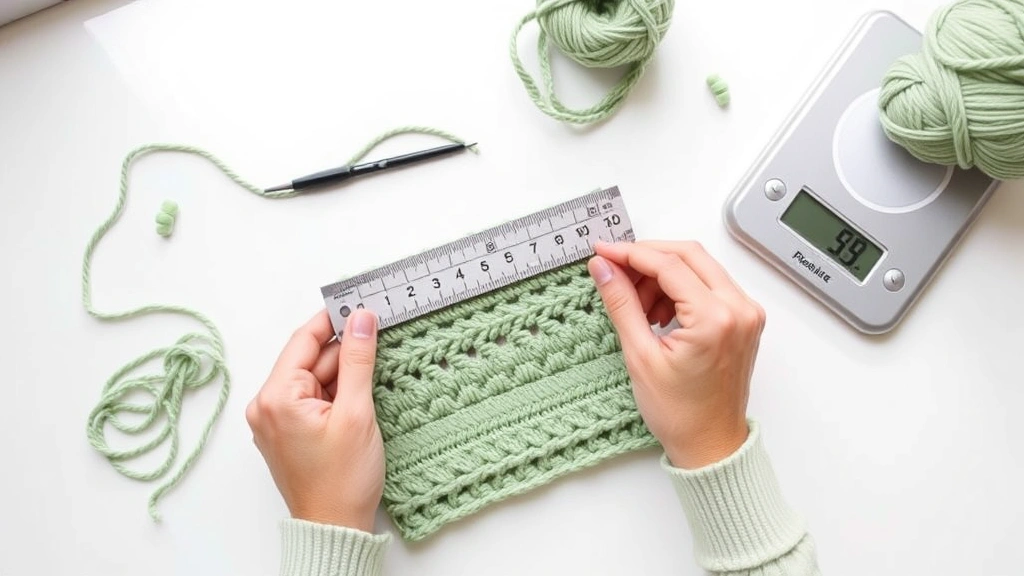
This is where the magic happens – turning your swatch into actionable data. Start by making a generous swatch, at least 6 inches square if possible. I know it seems like overkill, but larger swatches give you more accurate measurements.
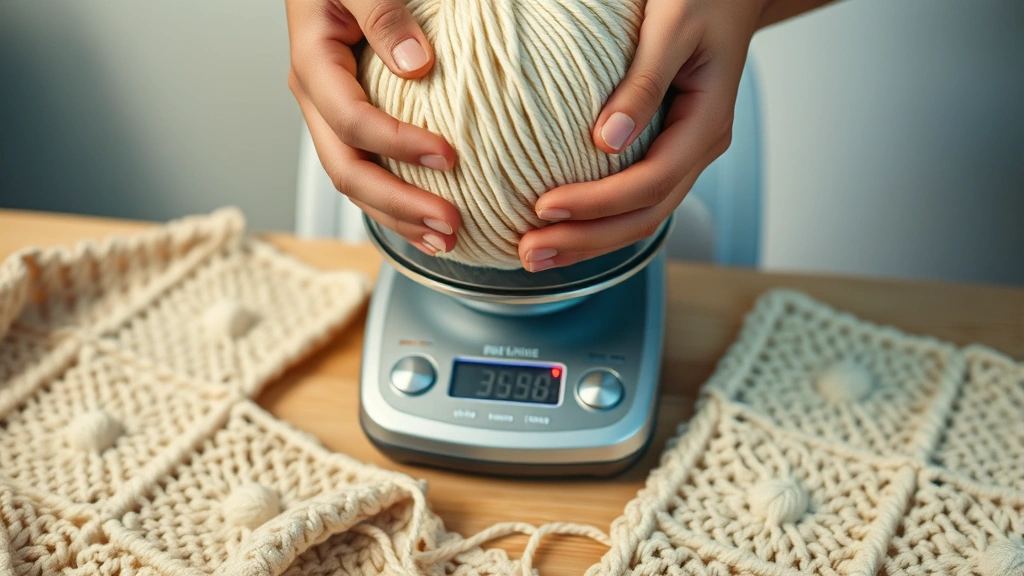
Before you start crocheting your swatch, weigh your yarn ball or skein. Most digital kitchen scales work perfectly for this. Write down the starting weight, then crochet your swatch using the proper hook hold and tension you’ll maintain throughout your project.
After completing your swatch, weigh the yarn again. The difference tells you exactly how much yarn (by weight) went into that specific area. Here’s my step-by-step process:
- Measure the swatch dimensions
Use a ruler to measure length and width in inches. Don’t stretch the fabric – measure it as it naturally lies.
- Calculate the area
Multiply length × width to get square inches. A 5×5 inch swatch = 25 square inches.
- Determine yarn weight used
Subtract final yarn weight from starting weight. Convert to grams if needed.
- Calculate yarn per square inch
Divide yarn weight used by swatch area. This gives you grams per square inch.
Now you have your personal yarn usage rate for that specific yarn, hook, and stitch pattern combination. This number accounts for your individual tension and crocheting style, making it way more accurate than generic pattern estimates.
For yardage calculations, you’ll need to know how many yards per gram your yarn contains. This information is usually on the yarn label, but you can also calculate it by dividing total yards by total grams in the skein.
| Yarn Weight | Typical Yards per 100g | Common Hook Size |
|---|---|---|
| Fingering (1) | 350-450 yards | 2.25-3.5mm (B-E) |
| Sport (2) | 250-350 yards | 3.5-4.5mm (E-7) |
| DK (3) | 200-250 yards | 4.5-5.5mm (7-I) |
| Worsted (4) | 180-220 yards | 5.5-6.5mm (I-K) |
| Bulky (5) | 120-180 yards | 6.5-9mm (K-M) |
Calculating for Different Project Types
Different projects require different approaches to yarn calculation. Let me walk you through the most common scenarios you’ll encounter.
Blankets and Afghans
Blankets are probably the most yarn-intensive projects most of us tackle. For a standard throw blanket (approximately 50×60 inches), you’re looking at 3000 square inches of coverage. Using worsted weight yarn with single crochet stitches, I typically see usage rates of about 0.8-1.2 grams per square inch.
Here’s my blanket calculation formula:
- Measure desired finished dimensions
- Multiply length × width for total square inches
- Multiply by your yarn usage rate (from swatch)
- Add 15-20% for borders, mistakes, and blocking
For example, a 50×60 inch blanket in worsted weight:
- 3000 square inches × 1.0 grams per square inch = 3000 grams
- Add 20% buffer = 3600 grams total
- At 200 yards per 100g = 7200 yards needed
Garments
Clothing calculations get trickier because of shaping and fit considerations. I always recommend making a full gauge swatch in your chosen stitch pattern and measuring carefully. Proper sizing techniques are crucial for accurate yarn estimates.
For a basic pullover sweater, I estimate yarn needs based on these general guidelines:
- Child size: 800-1200 yards worsted weight
- Adult small: 1200-1600 yards
- Adult medium: 1400-1800 yards
- Adult large: 1600-2200 yards
- Adult XL: 1800-2400 yards
Always check your pattern’s recommended yardage and compare it to these estimates. If there’s a big discrepancy, double-check your gauge.
Accessories
Smaller projects like hats, scarves, and mittens are easier to estimate but still benefit from proper calculation. A typical adult hat uses 150-250 yards of worsted weight yarn, while a 6-foot scarf might need 400-600 yards depending on width and stitch pattern.
Money-Saving Tip: For accessories, consider buying yarn in larger skeins rather than individual balls. The per-yard cost is usually lower, and you’ll have yarn left over for matching projects.
How Stitch Patterns Affect Yarn Usage
This is where things get really interesting. Different stitch patterns can dramatically affect how much yarn you need, even when working the same dimensions. I learned this the hard way when I switched from double crochet to single crochet mid-project and ran out of yarn with two rows to go.
Here’s how various stitches compare in terms of yarn usage (using worsted weight as baseline):
| Stitch Pattern | Yarn Usage | Coverage |
|---|---|---|
| Single Crochet | High | Dense, warm |
| Half Double Crochet | Medium-High | Good coverage |
| Double Crochet | Medium | Moderate drape |
| Treble Crochet | Medium-Low | Open, drapey |
| Shell Patterns | Medium | Textured |
| Mesh/Filet | Low | Very open |
Textured stitches like bobbles, popcorns, and cables use significantly more yarn than flat stitches. If your pattern includes these elements, add an extra 20-30% to your yarn estimate.
Colorwork also affects yarn usage. Tapestry crochet and intarsia techniques often require carrying yarn across the back of work, increasing overall yarn consumption. For complex colorwork, I typically add 25-35% to my base calculations.
Lace and Open Work
Lace patterns are tricky because they use less yarn per square inch but often require precise yardage for pattern repeats. When working lace, I always buy at least one extra skein from the same dye lot. The delicate nature of lace means you can’t easily hide joins or color variations.
Open stitch patterns like V-stitches and fan patterns create beautiful drape but can be deceiving in yarn calculations. The openness means less actual yarn per square inch, but the finished piece might stretch and require more rows than anticipated.
Substituting Yarns Successfully
Sometimes you fall in love with a pattern but want to use different yarn than what’s specified. Successful substitution requires understanding both the original yarn’s characteristics and your chosen replacement.
The key factors to match when substituting:
- Yarn weight: Stick within the same category (worsted to worsted, etc.)
- Fiber content: Consider drape, stretch, and care requirements
- Yardage per weight: This affects how much you’ll need to buy
- Gauge: Always swatch with your substitute yarn
Let’s say a pattern calls for 1200 yards of Brand A worsted cotton (200 yards per 100g), but you want to use Brand B worsted wool (180 yards per 100g). Here’s how to calculate:
- Pattern needs: 1200 yards
- Brand A: 1200 ÷ 200 = 6 units of 100g each
- Total weight needed: 600 grams
- Brand B equivalent: 600g ÷ 100g = 6 skeins
- Brand B yardage: 6 × 180 = 1080 yards
In this case, you’d need to buy extra yarn since Brand B has less yardage per weight unit. Always round up and add your safety buffer.
When working with different fiber types, remember that cotton has less stretch and recovery than wool, while acrylic tends to be lighter per yard than natural fibers. These differences can affect both your gauge and final yardage needs.
Dye Lot Alert: When substituting yarns, buy all your yarn at once from the same dye lot. Color variations between dye lots can be noticeable in large projects like blankets.
Tools and Resources for Planning
While manual calculations work great, several tools can make yarn planning easier and more accurate. I use a combination of digital and analog methods depending on the project complexity.
Digital Tools
Ravelry is invaluable for yarn planning. You can search for projects made with specific yarns, see how much others used, and read notes about yarn performance. The pattern database often includes user modifications with adjusted yarn amounts.
Yarn manufacturer websites are also goldmines of information. Lion Brand and Yarnspirations offer free patterns with detailed yarn requirements and often provide substitution guides.
Physical Tools
A good digital scale is essential for serious yarn planning. I use a kitchen scale that measures to the gram – it’s perfect for weighing skeins and tracking usage during projects.
Keep a project notebook where you record:
- Yarn brand, color, and dye lot numbers
- Hook sizes used
- Gauge measurements
- Actual yarn usage vs. estimates
- Any modifications made
This becomes your personal database for future projects. After a few projects, you’ll start seeing patterns in your yarn usage that make planning much easier.
Creating Your Own Reference Charts
I’ve created personal reference charts for my most-used yarn and hook combinations. For each combination, I note:
- Stitches per inch (horizontal gauge)
- Rows per inch (vertical gauge)
- Grams per square inch for different stitch patterns
- How the combination behaves after washing
This might seem obsessive, but it saves so much time and guesswork on new projects. Plus, it helps me make better yarn choices based on the project’s intended use.
Avoiding Common Calculation Mistakes
Let me share the mistakes I see most often – and the ones I’ve made myself – so you can avoid the frustration and extra trips to the yarn store.
The “Just One More Skein” Trap
This happens when you’re close to finishing and think one more skein will definitely be enough. More often than not, you’ll end up with most of a skein left over. Instead, calculate exactly how much you need for the remaining work. If it’s close to a full skein, buy it. If you only need 50 yards and the skein has 200, consider simplifying the remaining work or adding a border to use up the extra.
Ignoring Gauge Changes
Your gauge can change as you get more comfortable with a pattern or as you work for longer periods. I’ve noticed my tension tends to loosen up after the first hour of crocheting, which affects yarn usage. Check your gauge periodically throughout large projects.
Forgetting About Borders and Finishing
Borders can use a surprising amount of yarn, especially if they’re multiple rounds or include textured elements. A simple single crochet border around a throw blanket might use 200-300 yards. More elaborate borders can easily double that.
When calculating border yarn needs, measure the perimeter of your project and multiply by the number of rounds. Add extra for corner increases and any decorative elements.
Not Accounting for Blocking
Some projects grow significantly when blocked, especially lace and items made with natural fibers. This growth doesn’t require more yarn, but it does change the final dimensions. If you’re making something to specific measurements, factor in potential blocking changes when calculating initial dimensions.
Safety Net Strategy: For large projects, buy yarn in phases. Get enough for the main body plus one extra skein, then reassess before starting borders or final details. This prevents over-buying while ensuring you have enough to finish.
Miscalculating Colorwork
Stranded colorwork and intarsia use more yarn than single-color work because of the carried strands and color changes. For Fair Isle style patterns, add 30-40% to your base yarn calculation. For intarsia, calculate each color section separately and add 10-15% for ends and color changes.
Common Questions
How much extra yarn should I buy as a safety buffer?
For most projects, I recommend 10-20% extra yarn. Simple projects with consistent stitch patterns need less buffer (10-15%), while complex projects with multiple techniques or colorwork need more (20-25%). For expensive or hard-to-find yarns, err on the side of buying more.
Can I use online yarn calculators instead of making swatches?
Online calculators give rough estimates but can’t account for your personal tension, hook preferences, or specific yarn characteristics. They’re useful for initial planning but shouldn’t replace a proper gauge swatch for important projects. I use them for quick estimates when browsing patterns but always swatch before buying yarn.
What if I run out of yarn and can’t find the same dye lot?
Try alternating rows or sections with the new dye lot to blend the color difference. For blankets, you might incorporate the different dye lot as an intentional design element. Some yarn stores will let you exchange unused skeins from a different dye lot if you explain the situation.
How do I calculate yarn needs for adjusting pattern sizes?
Calculate the area difference between the original and desired size, then adjust proportionally. For example, if you’re making a blanket 25% larger in each dimension, you’ll need about 56% more yarn (1.25 × 1.25 = 1.56). This method works for simple geometric changes but gets complex with shaped garments.
Do I need different calculations for different hook materials?
Hook material can slightly affect gauge and yarn usage. Aluminum hooks tend to be slippery and might create slightly looser stitches than bamboo or wood. The difference is usually minimal, but if you’re switching hook materials mid-project, check your gauge to ensure consistency.
How much yarn do borders typically require?
A simple single crochet border uses approximately 0.5-1 yard per inch of perimeter per round. A 50×60 inch blanket has 220 inches of perimeter, so one round of single crochet needs about 110-220 yards. Multiple rounds or decorative borders can easily triple this amount.
What’s the best way to track yarn usage during a project?
Weigh your yarn at regular intervals and note how much project you’ve completed. For blankets, I weigh yarn after every few rows and calculate yards per row. This helps predict when I’ll need to buy more yarn and validates my initial calculations for future reference.
How do washing and blocking affect yarn calculations?
Washing and blocking don’t change the amount of yarn in your project, but they can change dimensions significantly. Cotton often grows when blocked, while wool can be shaped considerably. Always factor in post-blocking dimensions when calculating project size, especially for fitted garments.
Calculating yarn requirements might seem intimidating at first, but it’s honestly one of the most valuable skills you can develop as a crocheter. Once you get comfortable with the process, you’ll approach new projects with confidence instead of anxiety about having enough yarn.
The key is starting simple – make those gauge swatches, keep good notes, and don’t be afraid to buy a little extra until you get a feel for your personal yarn usage patterns. Every project teaches you something new about how different yarns, hooks, and stitches work together.
Remember, even experienced crocheters sometimes miscalculate. The goal isn’t perfection; it’s getting close enough that you’re not stressed about running out or drowning in leftover yarn. With practice, you’ll develop an intuitive sense for yarn requirements that makes planning projects much more enjoyable.
Happy crocheting, and may your yarn stash always have just the right amount for your next project!