Crochet Blanket Patterns for Beginners: Easy Designs to Master
There’s something genuinely magical about wrapping yourself in a blanket you’ve made with your own two hands. I remember my first crochet blanket—it was lumpy, the edges weren’t straight, and I’d somehow managed to increase stitches in places where I’d meant to decrease. But you know what? It was still the coziest thing I’d ever owned because I’d made it. If you’re thinking about diving into blanket-making, you’re in exactly the right place. Whether you’ve been crocheting for three weeks or three years, there’s a perfect blanket project waiting for you.
The beautiful thing about crochet blankets is that they’re incredibly forgiving. Unlike garments where fit matters, a blanket just needs to be the size you want it to be. This makes them absolutely perfect for practicing techniques, experimenting with new yarn, and building confidence without the pressure of getting everything exactly right. In this guide, I’m going to walk you through choosing your first blanket pattern, picking the right materials, and actually finishing the darn thing—because let’s be real, that’s where a lot of us struggle.
Why Blankets Are Perfect Beginner Projects
Let me be honest with you: if you’re just starting out with crochet, a blanket is genuinely one of the smartest projects you can choose. Here’s why. First, there’s no gauge pressure. Sure, gauge matters for sweaters and hats where fit is crucial, but if your blanket ends up being 52 inches wide instead of 50, nobody’s going to notice or care. Second, you get to practice the same stitch over and over again, which is how you actually build muscle memory and develop consistency. Third, there’s a real, tangible endpoint—you’re not dealing with complicated shaping or multiple pieces that need to match perfectly.
Blanket projects also give you tons of flexibility with yarn choices and colors. Want to use up a bunch of leftover yarn? Make a striped or granny square blanket. Want to challenge yourself with color work? You’ve got options. Want to keep it simple and meditative? A single-color blanket in a basic stitch is incredibly soothing. The point is, you control the complexity level entirely.
There’s also something really satisfying about the visible progress with blankets. Unlike a sweater where you might spend weeks on the body before anything looks like an actual garment, with a blanket you’re literally creating something beautiful and functional right from row one. You can wrap it around yourself halfway through and feel like you’ve accomplished something real.
Understanding Basic Crochet Stitches for Blankets
Now, let’s talk stitches. You don’t need to know a million different stitches to make a gorgeous blanket. In fact, most of my favorite beginner blankets use just one or two basic stitches repeated throughout. Let me break down the most beginner-friendly options:
Single Crochet: This is the shortest and tightest stitch. It creates a dense, sturdy fabric that’s perfect if you want a blanket with some weight to it. Single crochet blankets take longer to work up because the stitch is small, but they’re incredibly satisfying to make because every row feels substantial. The downside? Your hands might get tired faster, and you’ll need more yarn for the same size blanket.
Half Double Crochet: This is my go-to recommendation for first blankets. It’s taller than single crochet but not so tall that it creates big holes or feels flimsy. The fabric drapes nicely, it works up at a satisfying speed, and it’s forgiving if your tension isn’t perfectly consistent. Most beginner blanket patterns you’ll find use half double crochet as the main stitch.
Double Crochet: This stitch is taller and creates a more open, lacy fabric. It works up quickly, which means you’ll finish your blanket faster—always a plus when you’re starting out. Double crochet is great if you want a lighter blanket or if you’re working with thicker yarn. The slight openness in the fabric also means it breathes better, perfect for warmer climates.
Treble Crochet: I’d honestly skip this for your first blanket unless you’re feeling adventurous. It’s tall and creates a very open fabric that can feel less substantial, and it’s easier to accidentally drop stitches when you’re still building confidence.
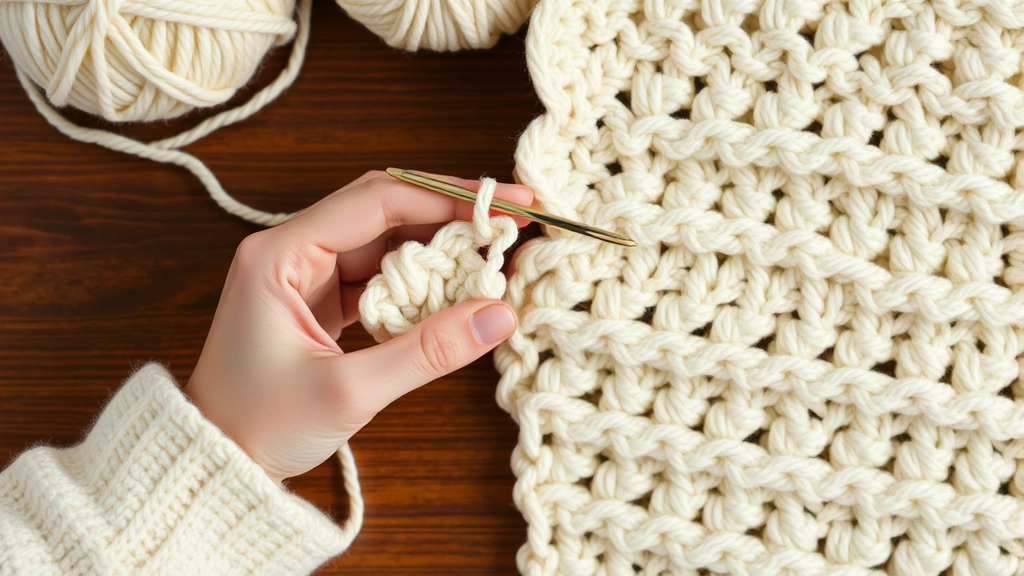
Here’s my practical tip: practice your chosen stitch on a swatch first. Make a 6×6 inch swatch using the yarn and hook you’ll use for your blanket. This accomplishes three things—you’ll get comfortable with the stitch, you’ll see exactly how the fabric looks and drapes, and you’ll have a gauge reference for your actual project. Plus, you’re not wasting this practice time; you can seam it onto your blanket later or keep it as a coaster.
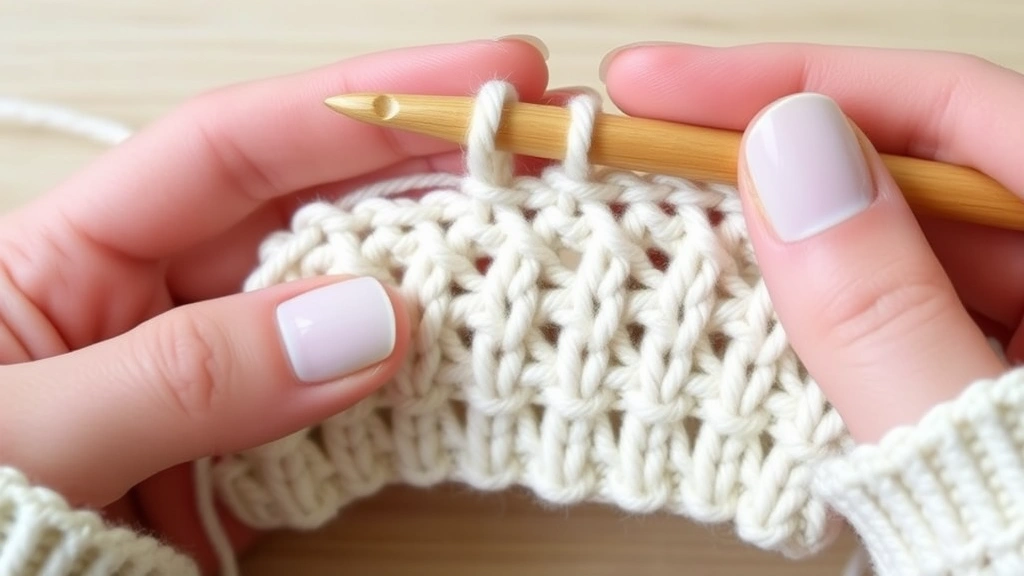
” alt=”Close-up of hands demonstrating half double crochet stitch with light colored yarn and wooden crochet hook”>
Choosing Your First Blanket Pattern
Okay, so where do you actually find patterns? There are honestly so many resources out there that it can feel overwhelming. Let me point you toward some reliable spots. Ravelry is the absolute gold standard—it’s like Instagram for fiber artists, and you can filter patterns by skill level, yarn weight, and stitch type. Yarnspirations has tons of free patterns with video tutorials, which is incredibly helpful when you’re learning. Many yarn brands also publish free patterns on their websites.
When you’re choosing a pattern, look for these key things:
- Skill level matches yours: If the pattern says “beginner,” it should use basic stitches and straightforward construction. Avoid anything that mentions color work, stitch abbreviations you don’t recognize, or complex shaping.
- Clear, detailed instructions: Good patterns explain each step in plain language or reference video tutorials. If you’re confused after reading the first paragraph, that pattern isn’t for you yet.
- Honest project reviews: On Ravelry, look at what other people who made the project say. If multiple people mention that the pattern has errors or that it runs small, that’s valuable information.
- Pattern structure that appeals to you: Do you want to make a blanket in one piece from corner to corner? Do you prefer making squares and seaming them together? Do you want stripes? These preferences matter for your enjoyment and completion rate.
My recommendation for your absolute first blanket? Find a pattern that’s just rows of the same stitch in the same color. Something like a classic granny square blanket or a simple single-color rectangle in half double crochet. These patterns let you focus on technique without worrying about pattern changes or color switching. Once you’ve finished one of these, you’ll have so much more confidence for trying something with stripes or texture.
Yarn Selection and Weight Matters
This is where a lot of beginners get confused, and honestly, it’s because yarn labeling can feel like deciphering ancient hieroglyphics. Let me demystify it.
Yarn weight refers to the thickness of the yarn, and it’s usually indicated by a number on the label (1-7, with some going higher). For blankets, you’re probably looking at weights 3-6:
- Weight 3 (DK/Light Worsted): This is a thinner yarn. Blankets made with this weight take longer but use less yardage per finished blanket. Great if you’re working with a limited budget or want a lighter blanket.
- Weight 4 (Worsted/Medium): This is the Goldilocks zone. It’s thick enough that blankets work up reasonably quickly, but not so thick that you’ll need massive amounts of yardage. Most beginner patterns are designed for this weight.
- Weight 5-6 (Bulky/Super Bulky): These work up super fast, which is amazing for motivation and seeing quick results. The downside is that bulky yarn blankets need a lot of yardage, which gets expensive. Also, the larger stitches can sometimes look a bit loose if your tension isn’t consistent.
Here’s what I actually recommend for beginners: start with a weight 4 yarn in a solid color. It’s the most forgiving, patterns are abundant, and you’ll get a finished blanket that looks polished without spending a fortune or waiting months to finish.
Now, about fiber content. Acrylic yarn gets a bad rap in some crochet circles, but honestly? It’s perfect for beginners. It’s affordable (crucial when you’re learning and might make mistakes), it comes in every color imaginable, and it’s durable and easy to care for. Once you’ve finished a few projects and want to explore, you can experiment with cotton, wool blends, or luxury fibers. But for your first blanket, acrylic is absolutely fine.
One practical tip: buy your yarn all at once. Dye lots can vary slightly, and if you buy yarn months apart, your blanket might have visible color differences even though you’re using the same “color.” Plus, if you run short, you might not be able to find the exact same dye lot later.
Essential Tools and Materials
The good news? You don’t need much to get started. Here’s exactly what you need:
A crochet hook in the right size: Your pattern will tell you what size to use. Don’t overthink this—if the pattern says use a 5.5mm hook, use a 5.5mm hook. Hooks are inexpensive, and having the right size makes a huge difference in how your blanket turns out.
Yarn (obviously): Make sure you buy enough. The pattern will tell you the yardage needed. Add 10% extra if you’re nervous—better to have leftover yarn than to run short two rows from the end.
Scissors: You probably already have these at home. They’re for cutting yarn when you finish.
A yarn needle (also called a tapestry needle): This has a large eye and a blunt tip. You’ll use it to weave in ends and sew pieces together if needed. These cost a couple dollars and are essential.
Stitch markers: These are optional but genuinely helpful. They’re little clips or rings you place on your stitches to mark where you are. You can buy actual crochet stitch markers, or you can use safety pins or even tie a small piece of contrasting yarn around a stitch. Totally up to you.
That’s it. You don’t need a fancy bag, you don’t need special lighting, you don’t need expensive tools. A hook, yarn, scissors, and a needle will get you through your entire first blanket.
Step-by-Step Guide to Starting Your Blanket
Alright, let’s actually make this happen. Here’s how to start your blanket project:
Step 1: Gather everything and read the pattern completely. Before you pick up your hook, read through the entire pattern. I know it seems tedious, but it takes five minutes and prevents so many mistakes. Make sure you understand the abbreviations and the overall structure.
Step 2: Make a gauge swatch. This is where you make a small practice piece using your chosen yarn and hook. Make it at least 4×4 inches, working in the stitch the pattern uses. This accomplishes two things: you’ll get comfortable with the stitch, and you’ll verify that your gauge matches the pattern (if gauge matters for your project).
Step 3: Prepare your workspace. You don’t need much—just a comfortable chair, good lighting, and a place to set your yarn ball so it doesn’t roll around. Some people use yarn bowls; others just put the ball in a mug. Whatever works.
Step 4: Make your foundation chain. This is usually the first instruction in any blanket pattern. A foundation chain is basically a series of chain stitches that form the base for your blanket. The pattern will tell you exactly how many chains to make. Pro tip: count your chains as you go, and put a stitch marker on every tenth chain. This makes it way easier to count to the right number without losing your place.
Step 5: Work your first row. Follow the pattern instructions carefully. Don’t rush. If you make a mistake, it’s totally fine to pull back and redo the row. This is where learning to fix mistakes becomes important.
Step 6: Develop a rhythm and stick with it. After the first few rows, you’ll find a comfortable pace and rhythm. Try to crochet at roughly the same speed and tension each time. This is where your blanket starts to look really polished and even.
Step 7: Take breaks to prevent hand fatigue. Crochet is repetitive, and your hands and wrists will thank you for taking breaks. I usually work for 30-45 minutes, then take a 10-minute break. Your hands will thank you.
Common Mistakes and How to Fix Them
Let’s talk about the stuff that goes wrong, because it happens to literally everyone. Here are the most common beginner blanket mistakes and how to handle them:
Accidentally increasing or decreasing stitches: This happens when you miss a stitch or work into the wrong loop. Your blanket edges start looking wonky. Solution: Count your stitches at the end of every row for the first few rows. Once you’ve got your rhythm, you can probably stop counting, but it’s a great safety net early on.
Tension inconsistencies: Your stitches look tight in some spots and loose in others. This is super common and honestly just takes practice. Solution: Try to keep consistent tension by holding your yarn the same way every time. If your tension is naturally loose, try holding the yarn a bit tighter. If it’s naturally tight, consciously relax your grip.
Holes appearing in your fabric: Sometimes you’ll accidentally skip a stitch or drop one without realizing it. Solution: If you catch it immediately, just pull back to that point and redo it. If you don’t notice until later, you can use your yarn needle to “fix” it by pulling the yarn through the gap, but honestly, for a blanket, a small hole isn’t the end of the world. Finish the blanket and move on.
Running out of yarn before finishing: This is heartbreaking but fixable. Solution: This is why I recommended buying 10% extra. If you do run short, you can add a border in a contrasting color or call it intentional and make it part of your design. Blankets don’t have to be perfect; they have to be finished.
Your blanket is bigger or smaller than expected: This usually happens because of tension or because you misunderstood the pattern. Solution: If it’s bigger, keep going—you’ll just have a larger blanket. If it’s smaller and you want it bigger, add more rows or a border. Blankets are incredibly flexible.
Finishing and Blocking Your Blanket
You’ve made it through all those rows, and now you’re at the finish line. Here’s how to properly finish your blanket so it looks polished and professional:
Weave in your ends: When you finish a row or add new yarn, you’ll have loose ends. Use your yarn needle to weave these ends through the back of nearby stitches. This secures them so they won’t unravel. Weave each end in about 3-4 inches in different directions for security.
Block your blanket (optional but recommended): Blocking is where you wet your finished blanket and pin it to shape while it dries. This evens out your stitches and makes everything look more polished. Here’s how:
- Fill a sink or tub with cool water and add a gentle wool wash (even for acrylic, gentle wash works fine).
- Submerge your blanket and let it soak for 15-20 minutes.
- Gently squeeze out excess water—don’t wring it.
- Lay it flat on a clean towel or blocking surface and gently pin the edges to your desired dimensions using blocking pins or even regular pins.
- Let it dry completely (usually 24-48 hours).
Blocking makes a noticeable difference, especially if your tension was inconsistent. It’s not absolutely necessary, but if you want your blanket to look really professional, it’s worth doing.
Add a border (optional): Many blankets look finished with a simple border. This is also a great way to even out any uneven edges. A single round of single crochet or slip stitch around the perimeter works beautifully. Check out tutorials on basic blanket border techniques if you want to try this.
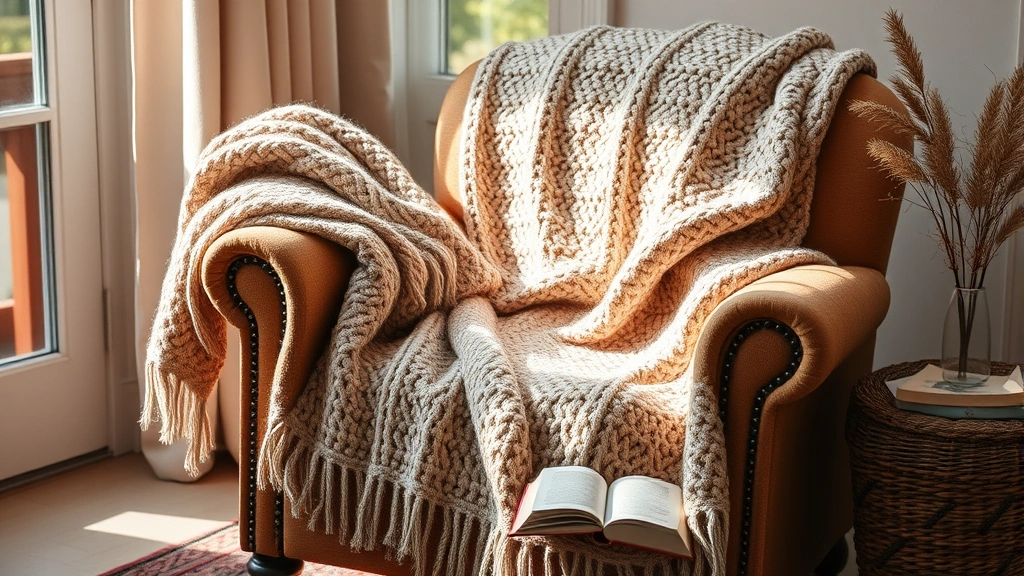
” alt=”Finished cozy blanket draped over armchair with warm lighting and cup of tea nearby”>
And that’s it. You’ve made a blanket. Seriously. Wrap yourself in it, take a photo, be proud of yourself. You’ve learned new skills, you’ve created something beautiful and functional, and you’ve proven to yourself that you can stick with a project from start to finish.
FAQ
What’s the easiest stitch for a beginner blanket?
Half double crochet is genuinely the sweet spot. It’s not too tight, not too loose, works up at a satisfying pace, and creates a nice drape. Single crochet is technically simpler but takes forever. Double crochet works up faster but can feel less substantial. Half double crochet is the Goldilocks choice.
How much yarn do I actually need?
This depends entirely on your pattern and yarn weight. A weight 4 yarn blanket is usually 1000-2000 yards. Always check your pattern—it’ll give you exact yardage. When in doubt, buy a bit extra.
Can I use leftover yarn from other projects?
Absolutely, especially for striped or granny square blankets. Just make sure you have enough total yardage. Keep track of how much yarn you use as you go so you know if you’ll run short.
How long does it take to finish a blanket?
Honestly? It depends on your pace, the pattern complexity, and how much time you have. A simple single-color blanket in half double crochet might take 20-40 hours of actual crochet time. That could be spread over three weeks or three months depending on how often you work on it.
What if I hate the blanket halfway through?
Pull it out and start over. I know that sounds harsh, but here’s the thing—you’re learning. If you’re not enjoying it, the blanket probably isn’t coming out the way you want anyway. Better to start fresh with a pattern you actually like. This is also why starting with simple projects matters; you’re less invested in finishing something you don’t love.
Do I need to use the exact yarn the pattern calls for?
Not necessarily, but you should use the same weight. If a pattern calls for a weight 4 yarn and you substitute with a different weight 4 yarn, you’ll be fine. If you substitute weight 4 with weight 6, everything will be different. When in doubt, make a gauge swatch to verify.
Is acrylic yarn okay for blankets?
Yes. Acrylic is affordable, durable, and comes in tons of colors. It’s perfect for learning. Once you’re more experienced, you can explore other fibers, but there’s nothing wrong with acrylic blankets.
What if I drop a stitch?
If you catch it immediately, just pull back to that point and redo it. If you don’t notice until later, you can use your yarn needle to secure it from the back, or you can just leave it if it’s not noticeable. For a blanket, perfection isn’t the goal; finishing is.
You’ve got this. Seriously. Pick a pattern, get your supplies, and start making something beautiful. The crochet community is incredibly supportive, and there are tons of resources (like Craftsy and YouTube tutorials) if you get stuck. Happy crocheting!