I’ll never forget the first time I tried to make a granny square. I followed the pattern exactly, but somehow ended up with something that looked more like a wonky trapezoid than a square. The corners were all wrong, the edges wavy, and I was ready to give up on granny squares forever. Sound familiar?
Here’s what I wish someone had told me back then: granny squares aren’t hard, but they do require understanding a few key techniques that most patterns just assume you know. The difference between a beginner struggling with uneven squares and someone confidently whipping out perfect grannies isn’t talent – it’s knowing these specific tricks.
After making hundreds of granny squares over the years (seriously, I went through a major granny square phase), I’ve figured out exactly what makes them work. Whether you’re planning a granny square blanket or just want to master this classic technique, I’m going to walk you through everything that actually matters.
Quick Answer
A perfect granny square starts with a magic ring, uses consistent tension, and maintains proper corner spacing with 2 chains between each 3-double-crochet group. The key is keeping your foundation chain loose and your double crochets at the same height throughout.
Getting Started: Foundation and First Round
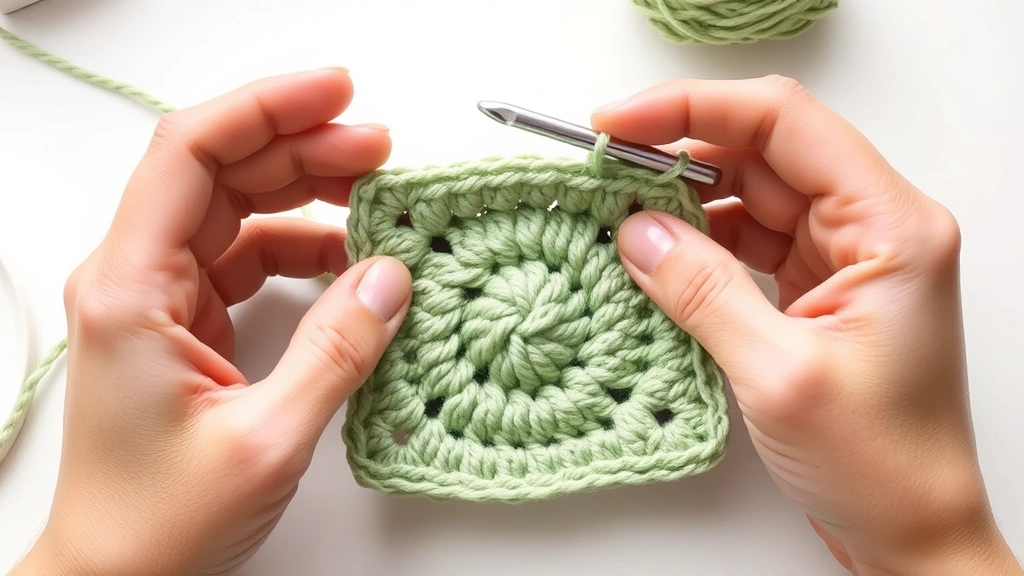
The foundation of your granny square sets the tone for everything that follows. I always start with a magic ring because it gives you complete control over the center hole size. If you’re not comfortable with magic rings yet, chain 4 and slip stitch to form a ring, but know that you’ll have a visible hole in the center.
For your first round, you’ll work 12 double crochets into the ring, but here’s where most people mess up: they don’t distribute them evenly. Think of your ring like a clock face and place 3 double crochets at 12, 3, 6, and 9 o’clock positions. Between each group of 3, you’ll chain 2 to create your corners.
Pro tip: Make your initial chain 3 (which counts as your first double crochet) slightly looser than usual. This prevents the dreaded tight corner that throws off your entire square.
The sequence for round 1 is: magic ring, chain 3, 2 double crochets in ring, *chain 2, 3 double crochets in ring* repeat 3 more times, chain 2, slip stitch to top of beginning chain 3. When you pull that magic ring tight, you should see four distinct corner spaces with three double crochets between each one.
Here’s something most tutorials don’t mention: the height of your stitches matters from the very beginning. Your chain 3 should be the exact same height as your double crochets. If it’s shorter, your corner will pull down. If it’s taller, you’ll get a weird bump. Practice this on a few sample squares until muscle memory kicks in.
Mastering the Corner Technique
The corner technique is what separates okay granny squares from gorgeous ones. Each corner consists of two groups of 3 double crochets with a chain-2 space between them. But the magic happens in how you work into that corner space.
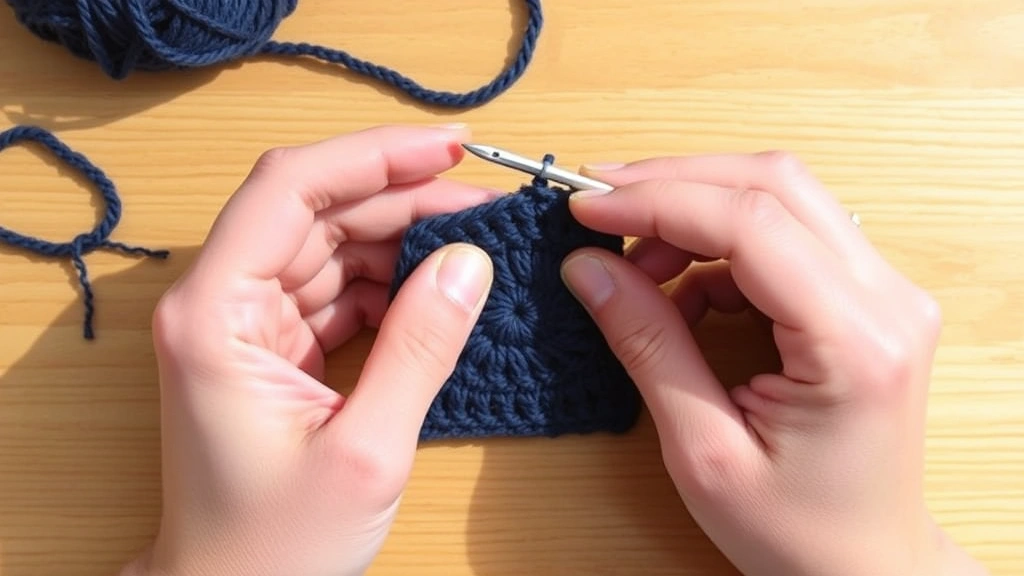
When you reach a corner in subsequent rounds, you’ll work your first group of 3 double crochets, then chain 2, then work another group of 3 double crochets – all into the same chain-2 space from the previous round. This creates the 90-degree angle that keeps your square actually square.
The most common mistake I see is people working too tightly into the corner space. You need to really get your hook in there and make room for all those stitches. I like to use the tip of my hook to gently open up the chain space before working into it.
Tension Check: After completing each corner, lay your work flat. The corner should lie completely flat without curling up or creating a pucker. If it’s not lying flat, your tension is off.
For consistent corners, count your stitches religiously. Each side of your square should have the same number of 3-double-crochet groups. Round 1 has 1 group per side, round 2 has 2 groups per side, round 3 has 3 groups per side, and so on. This mathematical precision is what keeps your square square.
Corner Spacing
The chain-2 spaces between groups are crucial for maintaining the square shape. Some patterns call for chain-1 spaces, but I find chain-2 gives better definition and helps prevent the sides from pulling in. If you’re using chunky yarn, you might even need chain-3 spaces to accommodate the bulk.
Building Additional Rounds
Once you’ve mastered the first round, building additional rounds follows the same principle with one key addition: you’ll work groups of 3 double crochets into the chain spaces along the sides, not just the corners.
For round 2, you’ll start in any corner space. Work your first corner (3 dc, chain 2, 3 dc), then chain 1 and work 3 double crochets into the next chain space along the side. Continue around, working corners in corner spaces and side groups in side spaces.
The pattern becomes: *corner (3 dc, ch 2, 3 dc), ch 1, side group (3 dc), ch 1* repeat around. As you add rounds, you’ll have more side groups but the corner technique stays exactly the same.
Here’s a counting trick that’s saved me countless times: each round should have one more group of 3 double crochets per side than the previous round. Round 1 = 1 group per side, Round 2 = 2 groups per side, Round 3 = 3 groups per side.
When working into chain spaces from previous rounds, I always insert my hook from front to back, yarn over, and pull through. Don’t split the chain – work around it. This keeps your stitches neat and prevents that lumpy look that screams “beginner work.”
Joining New Yarn
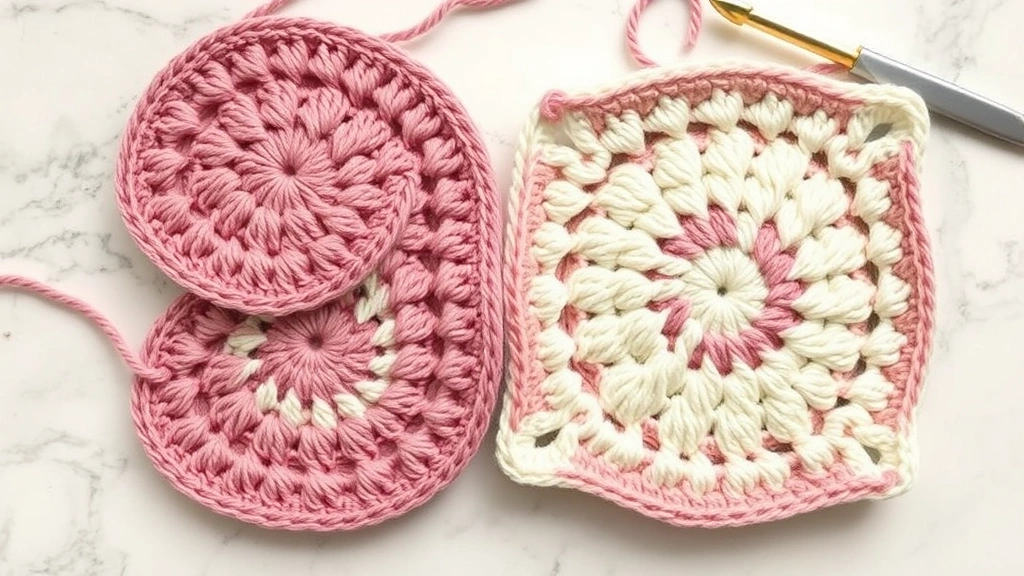
If you’re changing colors between rounds (which is half the fun of granny squares), join your new yarn in a corner space. This hides the join better than joining mid-side. Cut your old yarn leaving a 6-inch tail, and start your new color with a slip stitch in the corner space before beginning your chain 3.
Maintaining Consistent Tension
Tension consistency is probably the biggest factor in whether your granny squares look professional or homemade. I learned this the hard way when I made an entire afghan with wildly varying square sizes because my tension was all over the place.
The key is finding your natural tension and sticking with it. Don’t grip your yarn too tightly – let it flow through your fingers. Your stitches should be snug enough that they don’t have gaps, but loose enough that you can easily insert your hook into them on the next round.
I always do a tension check after completing each round. The square should lie completely flat. If the edges are curling up, you’re working too tightly. If there are gaps between stitches or the work looks loose and sloppy, you’re working too loosely.
| Yarn Weight | Hook Size | Typical Square Size (4 rounds) |
|---|---|---|
| Worsted (4) | 5.5mm (I) | 4.5 inches |
| DK (3) | 4.5mm (7) | 3.5 inches |
| Chunky (5) | 6.5mm (K) | 5.5 inches |
If you’re making multiple squares for a project, measure your first completed square and jot down the dimensions. Every subsequent square should match these measurements. If they don’t, adjust your tension or hook size accordingly.
Consistency Tip: Work all your squares in similar conditions. Your tension can change based on stress, fatigue, or even the temperature. I like to make squares for big projects in batches rather than sporadically over months.
Troubleshooting Common Problems
Let’s talk about the problems that make people want to throw their granny squares across the room. I’ve been there, and I’ve figured out solutions for the most frustrating issues.
Curling Edges
If your square is curling up at the edges, you’re working too tightly. This usually happens in the chain spaces – you’re not giving your stitches enough room to breathe. The fix is to go up a hook size or consciously loosen your tension, especially when working into chain spaces.
Wavy or Ruffled Edges
Wavy edges mean you’re working too loosely or accidentally adding extra stitches. Count your stitch groups carefully – it’s easy to accidentally work an extra group when you’re not paying attention. If your tension is the issue, go down a hook size.
Not Actually Square
This is usually a corner problem. You’re either not working enough stitches into the corner spaces (making it too rounded) or you’re working too many (making it too pointed). Stick to the 3 dc, chain 2, 3 dc formula for corners, and make sure you’re working into the actual chain space, not the stitches around it.
Holes in the Center
If you started with a chain ring instead of a magic ring, you might have a hole that’s too big. For future squares, try a magic ring or start with chain 3 instead of chain 4. For squares you’ve already made, you can often hide the hole when you’re weaving in ends.
Emergency fix: If you have a few wonky squares in an otherwise good batch, you can often block them into shape. Wet them slightly, pin them to the correct dimensions, and let them dry. This works especially well with natural fibers.
Best Yarn and Hook Combinations
Not all yarns are created equal for granny squares. After working with everything from cotton to alpaca, I have strong opinions about what works best.
Lion Brand Vanna’s Choice is my go-to for practice squares and large projects. It’s affordable, comes in tons of colors, and has just enough texture to hide minor tension inconsistencies. For something softer, Red Heart With Love is surprisingly nice for an acrylic.
Cotton yarns like Sugar’n Cream create beautifully defined stitches and are perfect for dishcloths or summer throws. Just know that cotton has no stretch, so tension mistakes are more obvious. KnitPicks Dishie is my favorite cotton for granny squares.
Hook Size Matters
Most worsted weight yarns work well with a 5.5mm (size I) hook for granny squares. This gives you good stitch definition without making the fabric too tight. If you’re a tight crocheter, go up to 6mm (size J). If you crochet loosely, try 5mm (size H).
For DK weight yarn, I usually use a 4.5mm or 5mm hook. The lighter weight yarn creates more delicate squares that are perfect for baby blankets or lightweight shawls.
Yarn Shopping Tip: Buy all your yarn for a project at once, even if it’s the same dye lot. Yarn companies sometimes change their formulations slightly, and you don’t want squares that feel different even if they look the same.
Finishing and Joining Techniques
A beautiful granny square deserves proper finishing. I always weave in my ends as I go – it’s so much less overwhelming than facing a pile of squares with dozens of loose ends.
For joining squares, I’m partial to the join-as-you-go method because it eliminates the tedious sewing step. But if you prefer to make all your squares first, a simple whip stitch or single crochet join works beautifully.
The Craft Yarn Council recommends blocking individual squares before joining them, and I couldn’t agree more. Even if you’re not normally a blocker, granny squares benefit enormously from a quick steam or wet block.
Border Considerations
If you’re making a single large granny square or want to add a border to your joined squares, work a round of single crochet first. This evens out any slight irregularities and gives you a clean foundation for more decorative borders.
For projects that will get heavy use, like baby blankets, I always add at least two rounds of single crochet border. It prevents the edges from stretching out and gives the finished piece more stability.
Common Questions
How much yarn do I need for granny squares?
For worsted weight yarn, plan on about 25-30 yards per 4-inch square (4 rounds). A throw-size blanket of 35 squares needs roughly 900-1000 yards total. Always buy 10% extra – you’ll thank me later when you need to remake a few squares or add extra border rounds.
Why do my granny squares curl up?
Curling happens when your tension is too tight, especially in the chain spaces. Try going up a hook size or consciously loosening your grip on the yarn. The chain spaces need room for all those double crochets to fit comfortably.
Can I make granny squares with different yarn weights?
Absolutely, but stick to one weight per project. Mixing weights creates squares of different sizes, which makes joining a nightmare. If you want variety, play with colors within the same yarn weight instead.
How do I keep my squares the same size?
Measure your first square and write down the dimensions. Use the same hook size and yarn weight for all squares, and check your gauge periodically. If squares start getting bigger or smaller, your tension has changed – take a break or adjust your hook size.
What’s the best way to change colors in granny squares?
Join new colors in corner spaces by completing the last stitch of the old color up to the final yarn over, then yarn over with the new color and pull through. This creates a clean color change without loose ends in weird places.
Should I use a magic ring or chain ring for the center?
Magic rings give you more control over the center hole size and create a neater finish. If you’re not comfortable with magic rings, chain 3 (not 4) and slip stitch to join – the smaller starting ring creates a less noticeable hole.
How long does it take to make a granny square?
A basic 4-round square takes me about 15-20 minutes once I’m in the groove. Beginners might need 30-45 minutes per square initially. The good news is you get faster quickly – granny squares are perfect for building muscle memory.
Can I make granny squares with cotton yarn?
Cotton works beautifully for granny squares, especially for dishcloths, pot holders, or summer blankets. Just remember that cotton has no stretch, so tension mistakes are more noticeable. Start with a slightly looser tension than you’d use for acrylic yarns.
Making perfect granny squares isn’t about following a pattern perfectly – it’s about understanding the underlying structure and developing consistent technique. Once you master the corner method and maintain steady tension, you’ll be cranking out squares that look like they came from a vintage crochet magazine.
The best part about granny squares is their forgiving nature. Even if your first few aren’t perfect, they’ll still work beautifully in a larger project. And honestly, some of my favorite blankets include squares from when I was still learning – they have character that perfectly uniform squares sometimes lack.
So grab your hook, pick a yarn you love, and start practicing. Before you know it, you’ll be the person everyone comes to for granny square advice. Trust me, once you get the hang of it, these little squares become absolutely addictive.