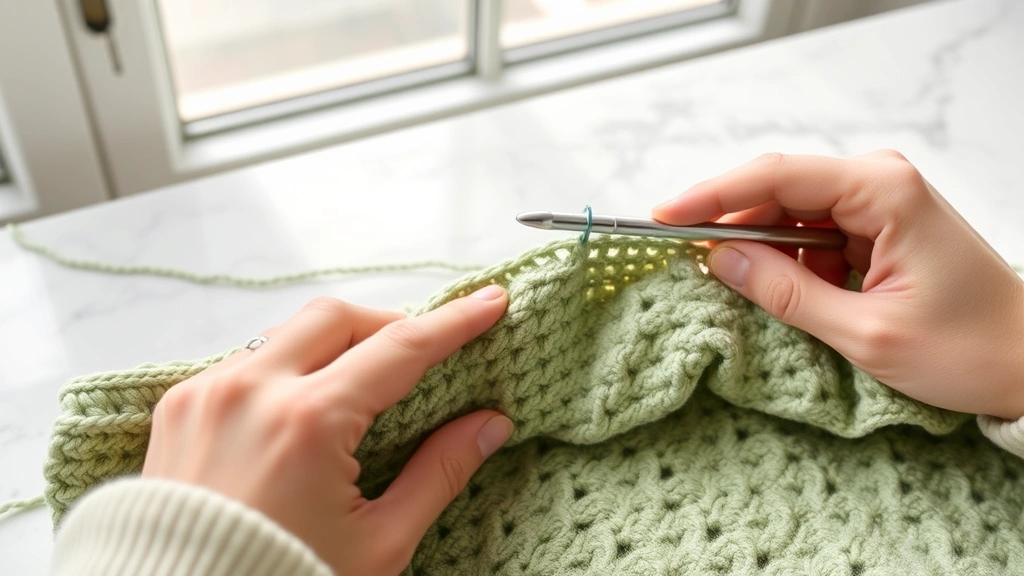
Last week, I was teaching my neighbor how to crochet her first dishcloth, and she kept asking why her edges looked wonky while mine stayed perfectly straight. It’s one of those things that seems mysterious until someone shows you the tricks – then it becomes second nature. Getting straight edges in crochet isn’t just about tension (though that matters too). It’s about understanding how stitches behave, where to place your hook, and developing consistent habits that keep your work looking professional.
I’ve been crocheting for over fifteen years, and I still remember the frustration of wavy edges on my early projects. Those first few scarves looked more like ruffled curtains than anything wearable. But here’s the thing – once you understand what causes crooked edges and learn the specific techniques to prevent them, your crochet confidence will skyrocket.
Whether you’re working on basic crochet stitches or tackling more complex patterns, straight edges are the foundation of professional-looking work. They’re what separate beginner projects from pieces that look store-bought. And honestly, the techniques aren’t complicated – they just require attention to detail and practice.
Quick Answer
Straight crochet edges come from consistent stitch placement, proper turning chains, and maintaining even tension. Count your stitches at the end of each row and always work into the correct stitch, including that tricky last stitch of the previous row.
Understanding Why Edges Go Wrong
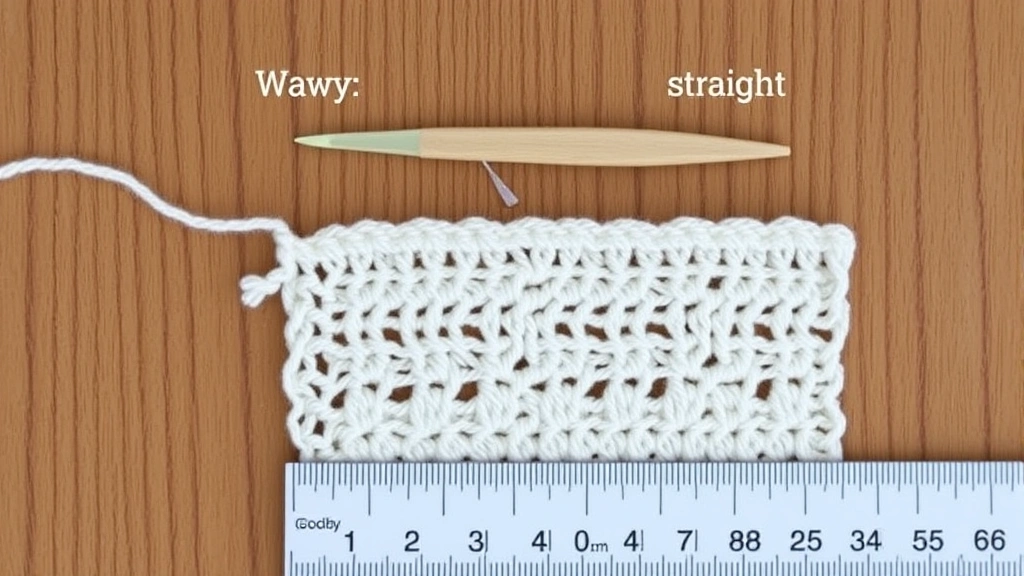
Before we dive into solutions, let’s talk about what causes those frustrating wavy, tight, or uneven edges. The most common culprit is inconsistent stitch count – either adding extra stitches where they don’t belong or missing stitches that should be there. This happens more often than you’d think, especially when you’re focused on getting your crochet tension right.
The second major cause is incorrect turning chain height. Each stitch type needs a specific number of turning chains to match its height. Single crochet needs 1 turning chain, double crochet needs 3, and so on. When your turning chain is too short, it pulls the edge tight. Too long, and you get loose, floppy edges that look unprofessional.
Tension inconsistency also plays a huge role. Most crocheters naturally tighten up at the ends of rows – it’s almost instinctive to pull that last stitch snug. But this creates edges that curve inward, making your rectangles look more like hourglasses.
Here’s something I learned the hard way: your first and last stitches of each row are the most important ones. They set the tone for your entire edge, so give them extra attention.
Finally, there’s the issue of not working into the correct stitches. It’s easy to accidentally skip the first stitch (because it’s hiding under your turning chain) or miss the last stitch of the previous row (because it doesn’t always look like a “real” stitch). These mistakes compound quickly, creating that dreaded diagonal slant.
Foundation Techniques for Straight Edges
Let’s start with the absolute basics that every crocheter needs to master. First, your foundation chain sets the stage for everything that follows. If it’s too tight, your entire project will pucker. Too loose, and your first row will be wobbly and uneven.
I always tell beginners to make their foundation chain with a hook one size larger than what they’ll use for the project. So if you’re using a 5mm hook for the body of your work, use a 5.5mm or 6mm hook for the foundation chain. This gives you just enough extra room without making it sloppy.
When you’re working your first row into the foundation chain, consistency is key. Always work into the same part of each chain stitch – I prefer working under two loops, but some crocheters work under just the back loop. What matters is doing it the same way every time.
For single crochet projects, work your first stitch into the second chain from your hook. For double crochet, it’s the fourth chain from your hook. This accounts for your turning chain and ensures your stitch count stays consistent from the very first row.
Stitch Counting Fundamentals
Every single row, count your stitches. I know it feels tedious, especially on longer rows, but it’s the only way to catch mistakes before they become unfixable problems. Use stitch markers every 10 or 20 stitches on long rows – it makes counting much faster and helps you identify exactly where mistakes happen.
Keep a small notebook or use your phone to jot down your stitch count for each row. If you’re working a simple rectangle, every row should have the same number of stitches. Any variation means you’ve either added or dropped a stitch somewhere.
Perfect Stitch Placement Every Time
This is where most edge problems actually start – putting your stitches in the wrong places. The first stitch of each row is often the trickiest because it’s right next to your turning chain, and it can be hard to distinguish where one ends and the other begins.
For single crochet, your first stitch goes into the first actual stitch of the previous row, not into the turning chain. The turning chain doesn’t count as a stitch in single crochet. For double crochet, it’s the opposite – your turning chain counts as the first stitch, so you skip the first actual stitch and work into the second one.
The last stitch of each row is equally important. In single crochet, you work into the last single crochet of the previous row. In double crochet, you work into the top of the turning chain from the previous row. This stitch often looks different from the others – it might be sideways or harder to see – but it’s crucial for maintaining your stitch count.
| Stitch Type | Turning Chain | First Stitch Placement | Last Stitch Placement |
|---|---|---|---|
| Single Crochet | 1 (doesn’t count) | First actual stitch | Last single crochet |
| Half Double Crochet | 2 (counts as stitch) | Second stitch | Top of turning chain |
| Double Crochet | 3 (counts as stitch) | Second stitch | Top of turning chain |
| Treble Crochet | 4 (counts as stitch) | Second stitch | Top of turning chain |
When working into the top of a turning chain, insert your hook under both loops at the very top of the chain. It should feel just like working into a regular stitch. If it feels awkward or looks wrong, you’re probably in the wrong place.
I always tell my students to think of the turning chain as a “fake” stitch in taller stitches. It takes up the space of a real stitch, so you have to treat it like one when you come back to it.
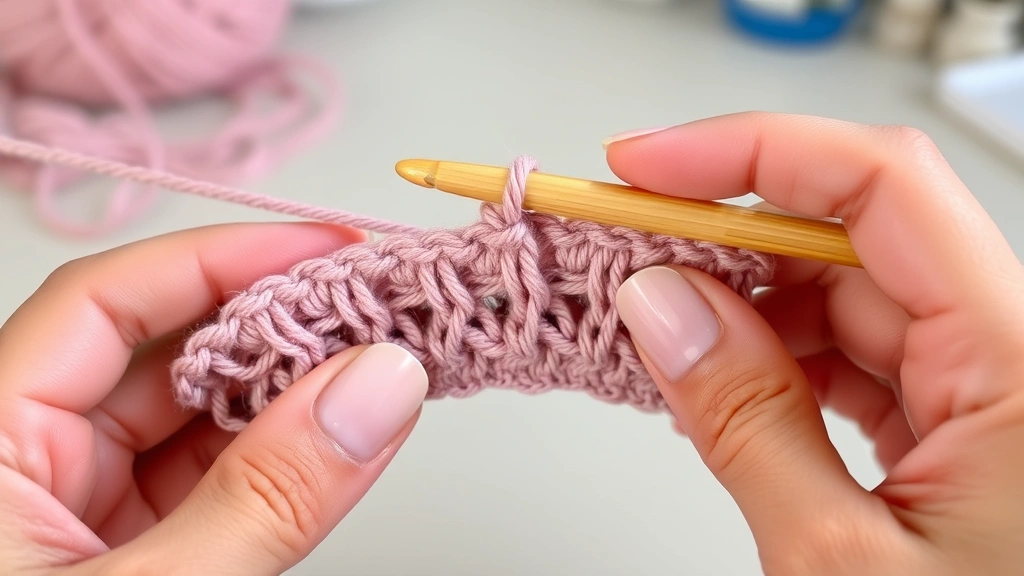
Mastering Turning Chains
Turning chains are probably the most misunderstood aspect of crochet edges. They serve two purposes: they bring your yarn up to the correct height for the next row, and in taller stitches, they often count as the first stitch of the new row.
The standard turning chain heights work for most crocheters, but you might need to adjust based on your personal tension. If your edges are too tight, try adding an extra chain to your turning chains. If they’re too loose, try using one fewer chain. There’s no crochet police – do what works for your hands and your yarn.
Here’s something that took me years to figure out: the position of your turning chain matters as much as its length. Always make your turning chain, then turn your work. Don’t turn first and then chain – this can twist your edge and create uneven tension.
When Turning Chains Count vs. Don’t Count
In single crochet, the turning chain is just there for height – it doesn’t replace a stitch. This means your first stitch goes into the first actual single crochet of the previous row, and you don’t work into the turning chain when you come back to it.
For double crochet and taller stitches, the turning chain usually counts as the first stitch. This means you skip the first actual stitch of the previous row and work into the second one. When you reach the end of that row, you work into the top of the turning chain.
Maintaining Consistent Tension
Tension consistency is one of those skills that develops over time, but there are specific techniques that can help you achieve more even edges right away. The key is being aware of how your hands naturally behave and making small adjustments to counteract those tendencies.
Most crocheters naturally tighten up at the ends of rows. Combat this by consciously loosening your grip on the yarn for the first and last few stitches of each row. It feels weird at first, but it prevents that inward curve that makes rectangles look like bow ties.
Your hook grip also affects edge consistency. If you’re gripping too tightly, your stitches will be uneven. Hold your hook like you’re holding a pencil – firm enough to control it, but relaxed enough that your hand doesn’t cramp after a few rows.
Yarn choice makes a difference too. Smooth yarns like cotton or acrylic blends are more forgiving for beginners because they slide easily and don’t grab the hook. Fuzzy yarns like mohair or textured yarns can make it harder to see your stitches and maintain consistent tension.
The Role of Blocking
Even with perfect technique, some projects benefit from blocking to achieve truly straight edges. This is especially true for natural fibers like wool or cotton. Blocking involves dampening your finished piece and pinning it to the correct dimensions while it dries.
For cotton projects, I use spray blocking – lightly mist the piece with water, pin it to a blocking mat, and let it dry overnight. Wool projects often benefit from wet blocking, where you soak the entire piece and then pin it out. Always check your yarn label for specific care instructions.
Troubleshooting Common Edge Problems
Let’s talk about fixing the most common edge problems you’ll encounter. Wavy edges usually mean you’re adding stitches somewhere – either working into the turning chain when you shouldn’t, or accidentally working two stitches into one space. Count your stitches religiously and compare each row to the previous one.
Tight, pulling edges typically indicate that your turning chains are too short or your tension is too tight at the row ends. Try adding an extra chain to your turning chains, or consciously loosening your grip for the first and last stitches of each row.
Diagonal edges are almost always caused by consistently missing the first or last stitch of rows. This is super common with half double crochet because the turning chain behavior is less intuitive than with single or double crochet.
Using Stitch Markers Strategically
Stitch markers aren’t just for complex patterns – they’re incredibly useful for maintaining straight edges. Place a marker in your first and last stitch of each row. This makes it impossible to miss them and helps you see exactly where your edges should be.
For longer rows, place markers every 20 stitches or so. This helps with counting and makes it easier to spot where mistakes happen. If row 15 has 47 stitches instead of 50, you know the problem is somewhere in those three missing stitches, not spread across the entire row.
Advanced Tips for Perfect Edges
Once you’ve mastered the basics, there are some advanced techniques that can take your edges from good to absolutely professional. One of my favorites is the “foundation single crochet” technique for starting projects. Instead of making a foundation chain and then working into it, you create the foundation and first row simultaneously. This eliminates the tension issues that often plague foundation chains.
Another game-changer is learning to read your work. After a few rows, you should be able to look at your project and see exactly where each stitch should go, even if you lose your place in the pattern. The stitches create a visual rhythm – once you can see it, maintaining straight edges becomes almost automatic.
For projects that will be seamed later, like granny squares or garment pieces, consider working your edge stitches slightly looser than the body stitches. This makes seaming easier and prevents puckering at the seams.
Here’s an advanced tip that changed my crochet game: take a photo of your work every few rows. Looking at it through a camera lens makes mistakes much more obvious than looking at it in your hands.
Finishing Techniques for Professional Edges
Even perfect edges can benefit from finishing techniques. A simple single crochet border around the entire piece can clean up any minor irregularities and give your project a polished look. Work one single crochet into each stitch along the top and bottom edges, and space your stitches evenly along the side edges.
For pieces that need to lay completely flat, like baby blankets or table runners, consider adding a picot edge or shell border. These decorative edges not only look beautiful but also help prevent curling.
Common Questions
Why do my crochet edges curve inward even when I count stitches correctly?
This usually happens because your tension tightens up at the ends of rows. Try consciously loosening your grip for the first and last 2-3 stitches of each row. Also check that your turning chains are the right height – too short and they’ll pull the edges tight.
Should turning chains count as stitches in all projects?
Not always. In single crochet, turning chains typically don’t count as stitches. In double crochet and taller stitches, they usually do. Always follow your specific pattern instructions, as some designers have their own preferences.
How do I fix edges that are too loose and wavy?
Wavy edges usually mean you’re adding extra stitches somewhere. Double-check that you’re not working into turning chains when you shouldn’t be, and make sure you’re not accidentally working two stitches into one space. Counting stitches at the end of each row will help identify where the extras are coming from.
What’s the best way to keep track of stitch count on long rows?
Use stitch markers every 20 stitches, and keep a small notebook to jot down your count for each row. For really long rows, I count in sections – if I know I should have 100 stitches total, I can quickly check that I have 20 stitches between each marker.
Can I fix crooked edges without starting over?
Minor edge issues can sometimes be fixed with blocking, especially in natural fibers. For more serious problems, you might need to add a border that compensates for the irregularities. But honestly, if the edges are really bad, it’s often faster to start over with better technique.
Why do my foundation chains always seem too tight?
Try using a hook one size larger for your foundation chain, then switch to your project hook for the first row. Also, be conscious of your tension when chaining – it’s easy to pull chains tighter than regular stitches without realizing it.
How do I know if my turning chains are the right height?
Your turning chain should bring your yarn to the same height as the stitches you’re about to make. If your edges are pulling tight, try adding an extra chain. If they’re loose and floppy, try using one fewer chain. There’s no universal rule – adjust based on your personal tension.
What yarn types are most forgiving for beginners learning edge control?
Smooth, medium-weight yarns like worsted weight acrylic or cotton are most forgiving. Lion Brand Vanna’s Choice and Red Heart Super Saver are excellent choices because they’re consistent, affordable, and easy to see your stitches.
Mastering straight crochet edges is one of those skills that transforms your entire crafting experience. Once you develop consistent habits around stitch placement, turning chains, and tension, you’ll find that your projects look more professional and you feel more confident tackling complex patterns. Remember, every expert crocheter started exactly where you are now – with wonky edges and lots of questions.
The key is patience with yourself and attention to detail. Count those stitches, place your markers, and don’t be afraid to frog a few rows if something looks off. Your future self will thank you for taking the time to get it right. And honestly, there’s something deeply satisfying about looking at a project with perfectly straight, even edges and knowing you created that with your own two hands.
Keep practicing, keep counting, and most importantly, keep crocheting. Those straight edges will become second nature before you know it, and then you’ll be the one helping other crocheters figure out why their rectangles look like hourglasses. Happy stitching!