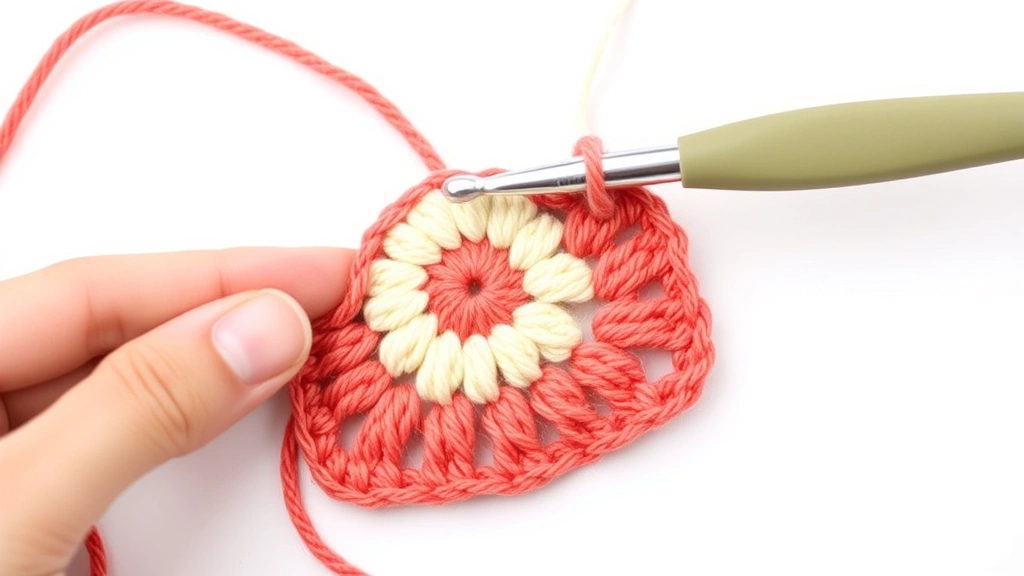
I still remember the first time I tried to crochet a granny square. I was so confident—how hard could it be, right? Three rounds in, I had something that looked more like a wonky pentagon than a square, and I was ready to throw my hook across the room. The problem? I had no clue about proper granny square sizing, and my tension was all over the place.
Here’s the thing about granny squares: they’re deceptively simple but surprisingly finicky when it comes to getting consistent sizing. Whether you’re making a blanket where every square needs to match perfectly or trying to figure out how many squares you’ll need for your project, understanding granny square dimensions is absolutely crucial.
After years of making countless granny squares—some disasters, some successes—I’ve learned that sizing isn’t just about following a pattern. It’s about understanding how your yarn choice, hook size, and tension work together to create squares that actually fit together nicely. And trust me, there’s nothing more frustrating than finishing 50 squares only to realize they’re all slightly different sizes.
Quick Answer
A standard granny square typically measures 4-6 inches when made with worsted weight yarn and an H-8 (5mm) hook. The final size depends on your yarn weight, hook size, tension, and how many rounds you complete—most classic squares use 4-6 rounds.
Standard Granny Square Measurements
When most crocheters talk about a “standard” granny square, they’re usually referring to a 4-round square made with worsted weight yarn and an H-8 (5mm) hook. This typically creates a square that measures about 4 to 4.5 inches across.
But here’s where it gets interesting—there’s actually quite a bit of variation in what people consider “standard.” I’ve seen patterns that call for everything from 3-inch squares to 6-inch squares, and they’re all considered normal granny square sizes.
Common Size Categories
Most granny squares fall into these general size ranges:
- Mini squares: 2-3 inches (great for coasters or detailed blankets)
- Small squares: 3-4 inches (popular for baby blankets)
- Medium squares: 4-5 inches (the most versatile size)
- Large squares: 5-7 inches (perfect for quick afghans)
- Jumbo squares: 8+ inches (statement pieces or pillow covers)
The beauty of understanding these categories is that you can plan your projects more effectively. When I’m working on a granny square blanket, I typically aim for 4-5 inch squares because they create a nice balance between detail and speed.
Pro tip: Always make a test square first, especially if you’re switching yarn brands or hook sizes. I learned this the hard way when I made 30 squares with a new yarn, only to discover they were all a half-inch smaller than my original squares.
Yarn Weight and Hook Size Impact
The relationship between yarn weight and hook size is probably the biggest factor in determining your final square size. This is where a lot of beginners get tripped up—they follow a pattern exactly but end up with completely different dimensions.
| Yarn Weight | Recommended Hook | Typical 4-Round Size | Best For |
|---|---|---|---|
| DK (3) | F-5 (3.75mm) | 3-3.5 inches | Baby items, detailed work |
| Worsted (4) | H-8 (5mm) | 4-4.5 inches | Most blankets, general use |
| Chunky (5) | J-10 (6mm) | 5-6 inches | Quick projects, thick blankets |
| Super Chunky (6) | N-15 (10mm) | 7-8 inches | Statement pieces, pillows |
I’ve found that choosing the right yarn for your granny squares makes a huge difference in both the final size and how easy they are to work with. Worsted weight yarn is forgiving and gives you that classic granny square look, while DK weight creates more delicate, detailed squares.
Hook Size Adjustments
Sometimes you love a particular yarn but need to adjust the size of your squares. Here’s how hook size changes affect dimensions:
- Going up one hook size: Increases square size by about 0.25-0.5 inches
- Going down one hook size: Decreases square size by about 0.25-0.5 inches
- Going up two hook sizes: Can increase size by 0.75-1 inch
The Craft Yarn Council provides excellent guidelines for yarn weight and hook size combinations, but remember that these are starting points. Your personal tension will always be the final determining factor.
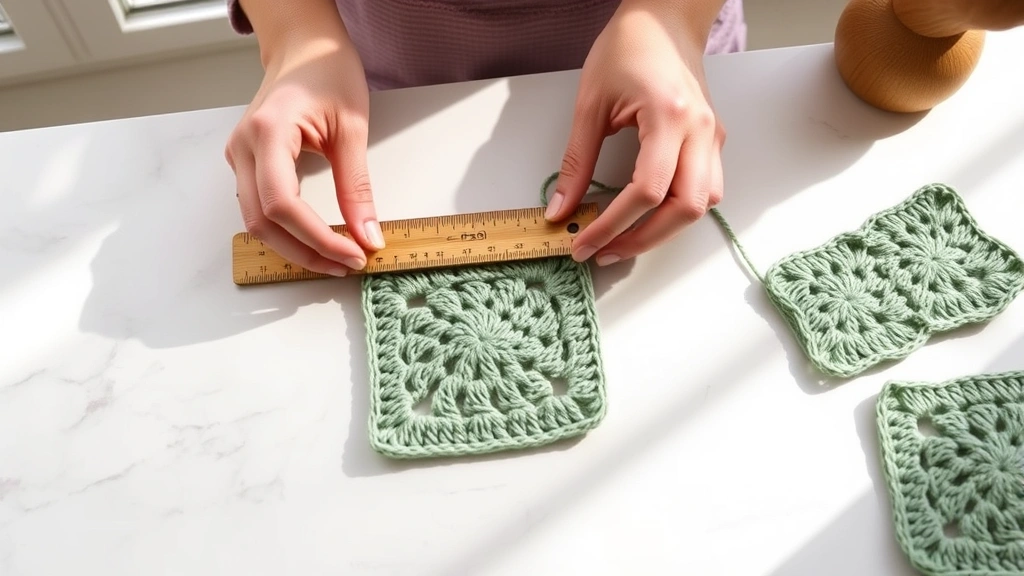
How to Measure Your Squares Accurately
Okay, this might seem obvious, but I’ve seen so many people measure their granny squares wrong. The key is consistency—you need to measure the same way every single time, or you’ll end up with squares that look the same size but don’t actually fit together properly.
The Right Way to Measure
Here’s my foolproof method for measuring granny squares:
- Lay the square flat
Place your finished square on a flat surface without stretching or compressing it. I like to use a cutting mat with grid lines—it makes everything easier to see.
- Measure from corner to corner
Place your ruler or measuring tape from one corner point to the opposite corner point. This gives you the diagonal measurement, which is often more accurate than side-to-side measuring.
- Check all four corners
A perfect square should have equal diagonal measurements in both directions. If they’re off by more than 1/8 inch, you might have tension issues.
- Record your measurements
Keep a project notebook with the yarn, hook size, and final measurements. Trust me, you’ll thank yourself later when you want to make matching squares.
I also recommend measuring after blocking if you plan to block your finished project. Blocking can change the size of your squares by up to 10%, so it’s important to account for this in your planning.
Measuring tip: If your squares are consistently coming out different sizes, try measuring after each round. This helps you identify exactly where the size variation is happening—usually it’s in the first or last round.
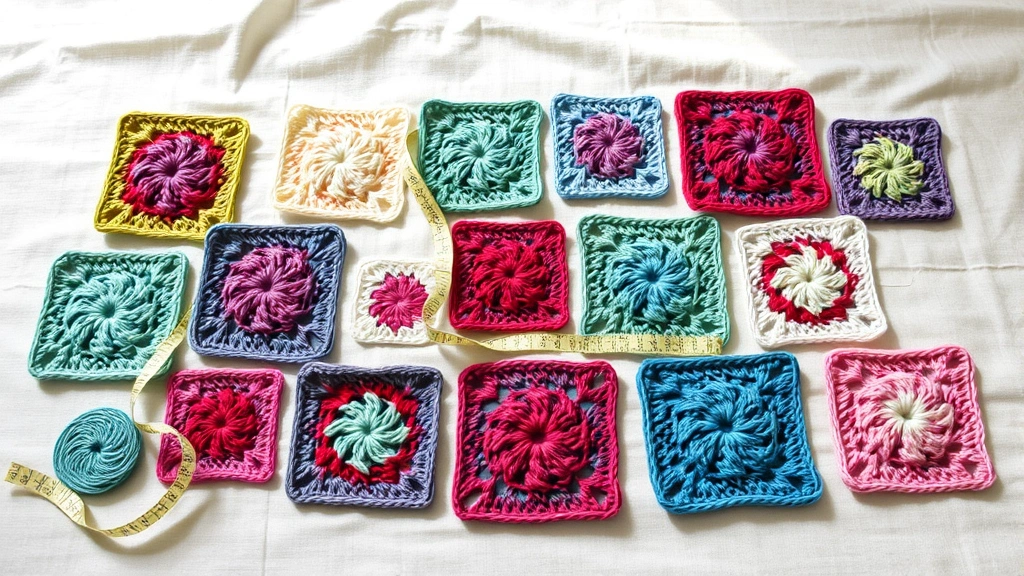
Getting Consistent Sizing Every Time
Consistency is the holy grail of granny square making. Nothing’s more frustrating than finishing a project only to realize your squares are all slightly different sizes. Here’s how to avoid that headache.
Tension Control
Your tension—how tightly or loosely you hold your yarn—is the biggest factor in square sizing. I used to be a tight crocheter, and my squares were always smaller than the pattern called for. It took me months to train myself to relax my grip.
Here are some techniques that helped me develop consistent tension:
- Use the same yarn position: Always hold your yarn the same way in your non-hook hand
- Take breaks: When you’re tired, your tension changes. I take a 10-minute break every hour
- Count your chains: In granny squares, corner chains are crucial. Always count to make sure you have the right number
- Practice the same time of day: I crochet better in the morning when I’m fresh and focused
Understanding different crochet stitches and how they affect your overall tension is also important. Some stitches naturally create more or less height, which can throw off your square proportions.
Environmental Factors
This might sound weird, but where and when you crochet can affect your square sizes. Humidity can make yarn behave differently, and your mood and energy level definitely impact your tension.
I keep all my squares for a single project in the same bag and try to work on them under similar conditions. It sounds obsessive, but it really helps with consistency.
Reality check: Even with perfect technique, you might have some size variation. That’s normal! A difference of 1/8 inch or less between squares usually won’t be noticeable in the finished project.
Troubleshooting Size Problems
Let’s talk about what to do when things go wrong—because they will. I’ve made every sizing mistake in the book, and here’s how to fix the most common problems.
Squares Too Small
If your squares are consistently smaller than expected:
- Go up a hook size: This is the easiest fix. Try going up one size and make a test square
- Loosen your tension: Consciously try to relax your grip on the yarn
- Add an extra round: Sometimes the pattern just needs one more round to reach the desired size
- Check your stitch count: Make sure you’re not accidentally skipping stitches
Squares Too Large
For squares that are coming out too big:
- Go down a hook size: Usually the most effective solution
- Tighten your tension: But don’t go overboard—you still want the fabric to drape nicely
- Use fewer rounds: A 3-round square instead of 4 might be perfect
- Double-check your yarn weight: You might have accidentally grabbed a heavier yarn
When working on beginner patterns, size variations are super common. Don’t get discouraged—it’s all part of the learning process.
Inconsistent Sizing
This is the trickiest problem to solve because it usually means your technique is varying from square to square. Here’s my systematic approach:
- Make 5 test squares in a row, measuring each one
- Identify which squares are off and by how much
- Look for patterns—are you getting tired? Distracted? Rushing?
- Adjust your process based on what you find
Pro tip: If you’re making a large project and notice size inconsistencies partway through, don’t panic. You can often use slightly smaller squares for borders or corners where the size difference won’t be as noticeable.
Planning Your Project Dimensions
Once you understand how to control your granny square size, you can start planning projects with confidence. This is where the math comes in—but don’t worry, it’s not complicated math.
Calculating Squares Needed
For a blanket or afghan, here’s how to figure out how many squares you’ll need:
- Decide on finished dimensions
Let’s say you want a 50″ × 60″ throw blanket.
- Account for joining
If you’re using a joining method that adds width (like single crochet seams), subtract about 0.25″ per join from your square size.
- Do the division
With 4.5″ squares: 50 ÷ 4.5 = 11 squares wide, 60 ÷ 4.5 = 13 squares long. So you need 143 squares total.
- Add extras
I always make 5-10% extra squares in case of mistakes or size variations.
For more complex projects, understanding how to read patterns becomes crucial, especially when you’re adapting patterns to different square sizes.
Border Considerations
Don’t forget about borders! If your pattern includes a border around the entire project, this will add to your finished dimensions. A typical single crochet border adds about 0.5-1 inch to each side, while a more decorative border might add 2-3 inches.
| Border Type | Added Width (Each Side) | Best For |
|---|---|---|
| Single crochet | 0.5 inches | Clean, simple finish |
| Shell border | 1-2 inches | Decorative blankets |
| Picot border | 0.75 inches | Baby items, delicate look |
| Multiple round border | 2-4 inches | Statement pieces |
Advanced Sizing Techniques
Once you’ve mastered basic granny square sizing, there are some advanced techniques that can take your projects to the next level.
Graduated Sizing
This technique involves making squares in different sizes within the same project. For example, you might use 3-inch squares for the center of a blanket, 4-inch squares for the middle section, and 5-inch squares for the border.
The key to graduated sizing is maintaining the same stitch gauge throughout. Use the same yarn and adjust only your hook size or number of rounds to achieve different square sizes.
Blocking for Size Adjustment
Strategic blocking can help you adjust square sizes by up to 15%. This is especially useful when you have a few squares that are slightly off.
- To increase size: Block with gentle stretching while damp
- To decrease size: Block without stretching, allowing natural shrinkage
- Steam blocking: Can help even out minor size differences
I learned about advanced blocking techniques from Ravelry forums, where experienced crocheters share incredibly detailed tips about getting perfect results.
Yarn Substitution and Sizing
When you want to substitute yarns in a pattern, understanding how different fibers behave is crucial. Cotton yarns tend to create slightly larger squares than acrylic yarns of the same weight, while wool can vary significantly depending on the specific breed and processing.
Always make test squares when substituting yarns, even if they’re the same weight category. I keep a project journal where I note how different yarn types affect my square sizes—it’s been invaluable for planning new projects.
Advanced tip: If you’re designing your own granny square pattern, start with your desired finished size and work backwards. Make test squares with different yarn/hook combinations until you find the perfect match.
Common Questions
How do I make my granny squares exactly 4 inches?
Use worsted weight yarn with an H-8 (5mm) hook and crochet 4 rounds. If your squares are too small, go up to an I-9 (5.5mm) hook. If they’re too large, try a G-6 (4mm) hook. Always measure after completing all rounds and adjust your hook size for the next square if needed.
Why are my granny squares different sizes even though I’m using the same pattern?
Tension variation is the most common cause. Your grip on the yarn might change when you’re tired, distracted, or working in different positions. Try to crochet at the same time of day, take regular breaks, and pay attention to how tightly you’re holding your yarn. Keeping a consistent chain count in corners is also crucial.
Can I mix different sized granny squares in one project?
Absolutely! This is called graduated sizing and can create beautiful effects. The key is planning your layout carefully. Use larger squares as focal points and smaller ones as fillers. Make sure your joining method can accommodate the size differences—sometimes you’ll need to add partial squares or triangular pieces to fill gaps.
How much yarn do I need for a 4-inch granny square?
A typical 4-inch granny square made with worsted weight yarn uses about 15-20 yards of yarn. This can vary based on your tension and the specific yarn brand. For planning purposes, I usually estimate 20 yards per square to account for variations and waste.
Should I block my granny squares before joining them?
It depends on your yarn and project. Cotton and wool squares benefit from blocking because it evens out stitches and can help with sizing consistency. Acrylic squares usually don’t need blocking unless you’re having size issues. If you do block, make sure all squares are blocked the same way for consistency.
What’s the best way to join granny squares without affecting the size?
The joining method you choose can add bulk and slightly change your finished dimensions. Whip stitch joining adds minimal bulk, while single crochet seams add about 0.25 inches to your overall project width. Different joining techniques each have their pros and cons, so choose based on your desired final look and size requirements.
How do I fix a granny square that’s the wrong size after I’ve finished it?
If it’s too small, you can add another round using the same or a coordinating color. If it’s too large, your options are more limited—you could try blocking it smaller, or unravel the last round if the size difference is significant. Sometimes it’s easier to remake the square, especially if you need many identical squares for your project.
Can I use different yarn weights in the same granny square project?
Yes, but you’ll need to adjust your approach. Use different hook sizes to achieve similar square sizes, or embrace the size variation as a design element. Mixing DK and worsted weight yarns can create interesting texture contrasts, but plan your layout carefully to ensure the different sizes work well together.
Understanding granny square sizing isn’t just about following rules—it’s about developing the skills to create exactly what you envision. Whether you’re making a simple baby blanket or an intricate heirloom afghan, knowing how to control your square dimensions gives you the freedom to be creative while ensuring professional-looking results.
The most important thing I’ve learned after years of making granny squares is that perfection isn’t the goal—consistency is. Your squares don’t need to be exactly 4.00 inches, but they should all be close to the same size. Embrace the handmade charm while striving for good technique, and you’ll create beautiful projects that you’ll treasure for years to come.
Now grab your favorite yarn and hook, and start experimenting! Make a few test squares with different combinations and see how the size changes. There’s no better teacher than hands-on experience, and once you understand how all these factors work together, you’ll have the confidence to tackle any granny square project.