
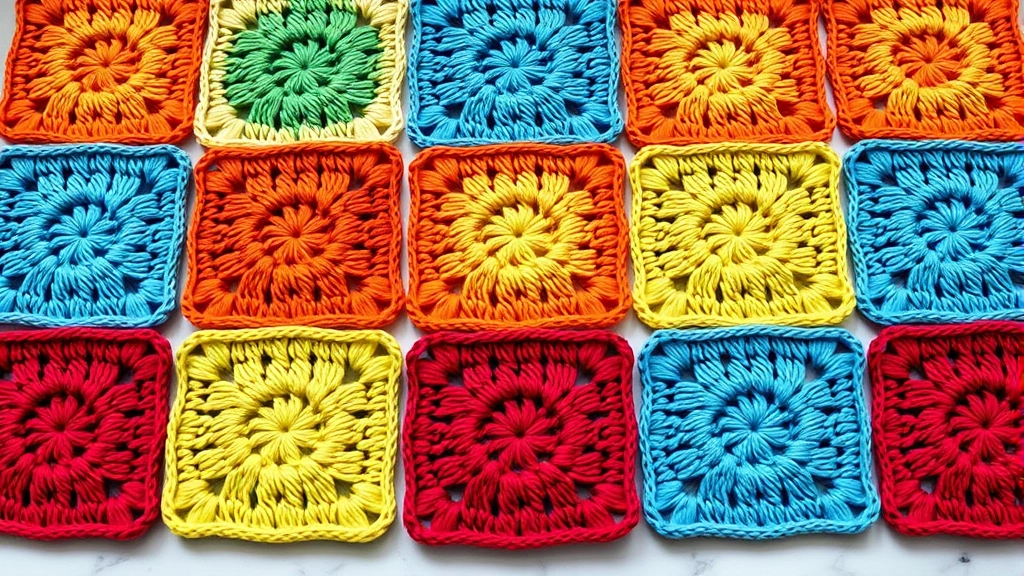
You know that moment when you’re halfway through a gorgeous granny square blanket and realize you’ve been joining your squares all wrong? Yeah, I’ve been there. The frustration of having beautiful individual squares that look like a hot mess when you try to connect them is real. After years of trial and error (and maybe a few choice words muttered under my breath), I’ve figured out the techniques that actually work for creating seamless, professional-looking joins.
Here’s the thing about joining granny squares – it’s not just about connecting pieces of fabric. The way you join them affects everything: how your finished project drapes, whether it lays flat, how durable it is, and honestly, whether you’ll be proud to show it off or stuff it in a closet. I’ve seen too many beautiful projects ruined by sloppy joins, and I don’t want that to happen to you.
The good news? Once you understand the fundamentals and have a few reliable techniques in your toolkit, joining granny squares becomes almost meditative. There’s something satisfying about watching individual squares transform into a cohesive piece. Whether you’re making a granny square baby blanket for a new arrival or tackling an ambitious king-size throw, the techniques I’m sharing will give you professional results every time.
Quick Answer
The best methods for joining granny squares are whip stitch, single crochet, and slip stitch joins, each creating different effects. Choose whip stitch for invisible seams, single crochet for decorative ridges, and slip stitch for flat, sturdy connections.
Preparing Your Squares for Joining
Before you even think about connecting your first two squares, you need to get them ready. This prep work makes the difference between a join that looks professional and one that screams “homemade” (and not in a good way).
First, block your squares. I know, I know – blocking feels like extra work when you’re excited to see your project come together. But trust me on this one. Even if you’re using acrylic yarn that doesn’t traditionally need blocking, a light steam or wet block will even out your stitches and make your squares the same size. Inconsistent square sizes are the number one reason joins look wonky.
Here’s my blocking process: Pin each square to your blocking mats, measuring to ensure they’re all the same dimensions. For a standard granny square made with worsted weight yarn and a 5mm hook, you’re usually looking at about 4 inches square. Spray lightly with water or use a steam iron held about 6 inches away. Let them dry completely before unpinning.
Pro Tip: Make a cardboard template the size of your blocked squares. Use it to check each square before joining – any that don’t match need to be blocked again or adjusted.
Next, decide on your layout. This isn’t just about color placement (though that’s important too). You need to think about how your squares will connect. Are you doing a simple grid? A more complex pattern? Sketch it out or use a design wall if you have one. I like to lay all my squares out on my bed and take a photo with my phone so I can refer back to the arrangement as I work.
Finally, choose your joining yarn. This might seem obvious, but I’ve seen people use whatever yarn they have handy, and it shows. Use the same yarn you used for your squares, or at least the same weight and fiber content. If you’re joining squares made from different yarns (maybe you’re using up your stash), choose a neutral color that appears in most of your squares.
The Whip Stitch Method
The whip stitch is my go-to method when I want joins that virtually disappear. It creates a flat seam that doesn’t add bulk, making it perfect for blankets that need to drape nicely. This technique works especially well when you’re making something like a throw blanket that you want to feel soft and flexible.
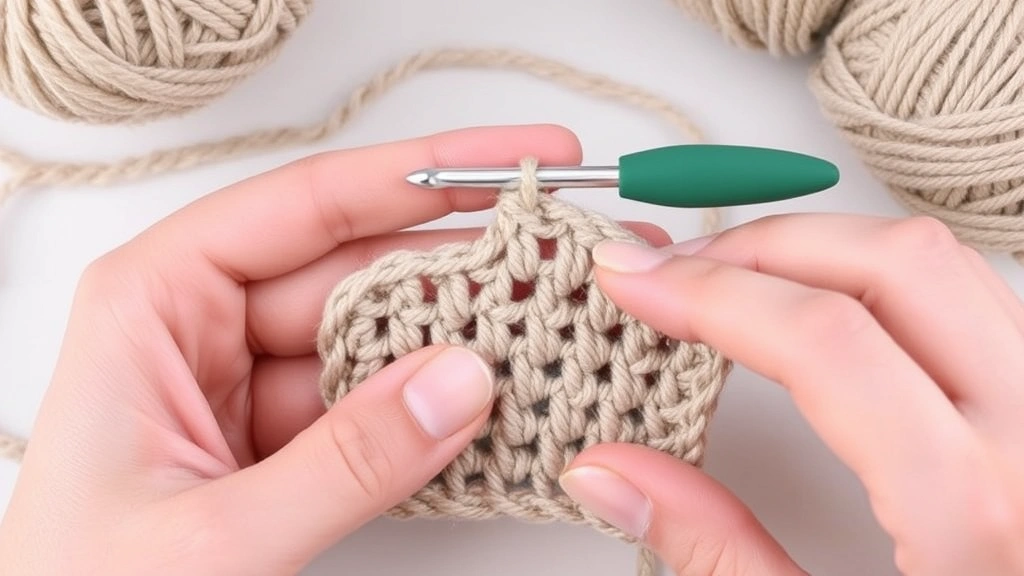
To start a whip stitch join, place two squares right sides together. You’ll be working through both layers, catching the back loops only of the corresponding stitches. Thread a tapestry needle with about 18 inches of yarn – any longer and it gets tangled, any shorter and you’ll be rethreading constantly.
Begin at one corner, inserting your needle through the back loop of the corner stitch on the front square, then through the back loop of the corresponding corner stitch on the back square. Pull the yarn through, leaving a 4-inch tail that you’ll weave in later. Continue along the edge, working through back loops only, keeping your stitches evenly spaced and the same tension.
Tension Tips for Whip Stitch
Here’s where most people mess up: tension. Pull too tight and your seam puckers. Too loose and you get gaps. The sweet spot is snug but not tight – your joined edge should lay flat when you open the squares. I test the tension every few stitches by gently opening the squares to check.
“I used to pull my whip stitches way too tight, thinking it would make them stronger. All it did was create a stiff, puckered mess. Now I aim for the same tension I use when crocheting – firm but flexible.” – My hard-learned lesson
When you reach the end of the seam, secure your yarn by weaving it through several stitches on the wrong side. Don’t just tie a knot – it’ll work loose over time and create a weak spot. A proper weave-in is worth the extra minute it takes.
Single Crochet Join Technique
The single crochet join creates a raised ridge on the right side of your work, which can be a design feature rather than something to hide. This method is incredibly strong and works beautifully when you want your joins to be part of the overall design aesthetic. It’s also faster than hand-sewing once you get the rhythm down.
Place your squares wrong sides together – yes, wrong sides, not right sides like with the whip stitch. This puts the ridge on the front where it becomes a decorative element. Using the same size hook you used for your squares, insert your hook through both layers, catching the back loops of corresponding stitches.
Start with a slip knot on your hook, then single crochet through both layers along the entire edge. The key is maintaining consistent tension and making sure you’re catching both squares with each stitch. I like to work one stitch in each corner space and one stitch in each double crochet along the sides.
Creating Consistent Ridges
The beauty of the single crochet join is in those neat, even ridges. To get them consistent, count your stitches as you work the first few joins. A standard 4-inch granny square typically needs about 15 single crochet stitches along each edge, but this can vary based on your gauge and hook size.
If you’re working with chunky yarn, you might need fewer stitches, while fingering weight might need more. The goal is to have the same number of joining stitches on every seam so your ridges look uniform across the entire project.
| Yarn Weight | Hook Size | Typical Stitches per Edge |
|---|---|---|
| Worsted (4) | 5mm (H) | 15-16 stitches |
| DK (3) | 4mm (G) | 18-20 stitches |
| Chunky (5) | 6mm (J) | 12-13 stitches |
Slip Stitch Join Method
The slip stitch join is the chameleon of joining methods – it’s nearly invisible but incredibly secure. This technique creates the flattest seam possible while still using a crochet hook, making it perfect for projects where you want the squares to look like they were made as one continuous piece.
Like the single crochet method, you’ll place squares wrong sides together. But instead of single crocheting, you’re slip stitching through both layers. This creates minimal bulk and virtually no ridge, while still giving you the speed advantage of using a hook instead of a needle.
Insert your hook through both back loops, yarn over, and pull through both the squares and the loop on your hook in one motion. That’s it – one smooth motion per stitch. The key is keeping your tension loose enough that the seam doesn’t pucker, but tight enough that there aren’t gaps.
When to Choose Slip Stitch
I reach for the slip stitch join when I’m making something that needs to lay perfectly flat, like a pillow cover or wall hanging. It’s also my preferred method when working with variegated or self-striping yarns where a visible seam might interrupt the color flow.
The downside? It’s not as strong as single crochet joins, so I wouldn’t recommend it for heavily used items like afghans that get washed frequently. But for decorative pieces or items that won’t see heavy wear, it’s perfect.
Flat Braid Join for Decorative Effect
Sometimes you want your joins to be the star of the show. The flat braid join creates a beautiful woven effect between squares that adds texture and visual interest. It’s a bit more time-consuming than other methods, but the results are stunning.
This technique requires three colors of yarn – typically the main color from your squares plus two contrasting colors. You’ll need about 12 inches of each color for each seam. The process involves creating a flat braid, then stitching it between your squares.
- Create the Braid
Cut three strands of yarn, each about 12 inches long. Tape the ends to your work surface and braid loosely, keeping the braid flat rather than twisted. The finished braid should be about the same length as your square’s edge.
- Position the Braid
Place squares right sides up with a small gap between them. Center the braid in this gap, with the braid covering the space between squares.
- Stitch in Place
Using a tapestry needle and matching thread, stitch along both edges of the braid, securing it to the squares. Work through the back loops of the squares’ edge stitches.
This method works beautifully with cotton yarn because it holds its shape well and the braid stays flat. It’s perfect for decorative throws or wall hangings where the joins become part of the design.
Common Problems and Solutions
Even with the best techniques, sometimes things go wrong. Here are the issues I see most often and how to fix them.
Puckering Seams
If your seams are puckering, you’re pulling too tight. This is especially common with hand-sewn joins. The fix is to remove the problematic seam and redo it with looser tension. I know it’s frustrating, but a puckered seam will only get worse with washing and use.
Prevention is better than fixing: practice your tension on a sample before committing to your actual project. Join two practice squares and check that they lay flat when opened.
Gaps in Seams
Gaps usually happen when your tension is too loose or you’re not catching both squares consistently. Check that you’re going through the correct loops on both squares with every stitch. Sometimes the solution is using a smaller hook or pulling slightly tighter.
Uneven Squares
This is why blocking is so important. If your squares are different sizes, no joining technique will make them look good together. You’ll need to block them to the same size, or in extreme cases, remake the outliers.
Quick Fix: If one square is slightly smaller, you can sometimes add an extra round to bring it up to size. Use the same yarn and stitch pattern as the final round of your other squares.
Visible Color Changes
When joining squares made with different yarn colors, choose your joining yarn carefully. A neutral color that appears in most squares usually works best. Alternatively, embrace the contrast and use a completely different color as a design element.
Adding Borders and Final Details
Once all your squares are joined, you’re not quite done. A border can make the difference between a project that looks homemade and one that looks professionally finished. The border also helps stabilize your joins and gives you a chance to fix any minor imperfections.
For most granny square projects, I recommend at least two rounds of border. The first round evens out any irregularities from joining, while the second round creates a clean, finished edge. Single crochet is reliable for the first round – it’s forgiving and helps even out tension issues.
Work around the entire perimeter, placing one single crochet in each stitch along the sides and three single crochet in each corner to keep the border flat. When you reach a join, work through both layers to reinforce the connection.
Border Stitch Options
For the final round, you have lots of options depending on your project’s purpose:
- Single crochet: Clean and simple, perfect for everyday blankets
- Shell stitch: Decorative and feminine, great for baby blankets
- Picot edge: Delicate and pretty, ideal for decorative throws
- Reverse single crochet: Creates a rope-like edge that’s very durable
The Craft Yarn Council has excellent resources for border techniques if you want to explore more options.
Common Questions
What’s the strongest way to join granny squares?
The single crochet join is the strongest method because it creates a raised ridge that distributes stress along the entire seam. It’s perfect for blankets that will see heavy use and frequent washing. The whip stitch is also quite strong when done properly, but the single crochet edge gives you extra durability.
How much yarn do I need for joining squares?
Plan on about 10-15 yards of yarn per square for joining, depending on your method and square size. A baby blanket with 35 squares needs roughly 350-525 yards just for joining. Always buy an extra skein of your main color specifically for joining and borders.
Can I join squares made with different yarn weights?
It’s possible but tricky. The different yarn weights will create squares of different sizes and textures, making joining challenging. If you must mix weights, block all squares to the same size and use the weight of yarn that matches the majority of your squares for joining.
Should I weave in ends before or after joining?
Weave in the ends from making individual squares before joining, but leave the tails from your center chain long enough to help with joining if needed. Weave in joining tails as you complete each seam – don’t leave them all for the end or you’ll have a tedious finishing session.
Why do my joined squares look wavy?
Wavy edges usually mean your tension is inconsistent or you’re adding too many stitches in the corners. Each corner should have exactly three stitches (for most joining methods) to keep the work flat. Practice on sample squares until you get consistent tension.
How long does it take to join a granny square blanket?
For a typical throw-size blanket (about 48 squares), expect 8-12 hours of joining time using hand-sewing methods, or 6-8 hours using crochet methods. This doesn’t include blocking time or adding borders. The flat braid method takes significantly longer – plan for 15-20 hours.
Can I machine wash a granny square blanket?
Yes, if you used machine-washable yarn and your joins are secure. Test wash a small sample first to check how the joins hold up. Use a gentle cycle and avoid fabric softener, which can weaken yarn fibers over time. Many crocheters find that Lion Brand and Red Heart acrylic yarns hold up well to machine washing.
What’s the best needle for hand-sewing joins?
Use a tapestry needle with a blunt tip and an eye large enough for your yarn. Size 16 or 18 works well for worsted weight yarn. The blunt tip prevents you from splitting yarn fibers, and the large eye reduces friction that can weaken the yarn as you pull it through.
Joining granny squares doesn’t have to be the tedious part of your project. With the right techniques and a bit of practice, it becomes a satisfying process that brings your vision to life. Remember, the key is consistency – whatever method you choose, use it throughout your entire project for the most professional results.
Take your time with the prep work, choose the joining method that matches your project’s needs, and don’t be afraid to redo a seam if it’s not quite right. Your future self (and anyone who receives your finished project) will thank you for the extra effort. The difference between a good granny square project and a great one often comes down to how well those squares are joined together.
Now grab your squares, pick your joining method, and start connecting. You’ve got this, and I can’t wait to see what you create.