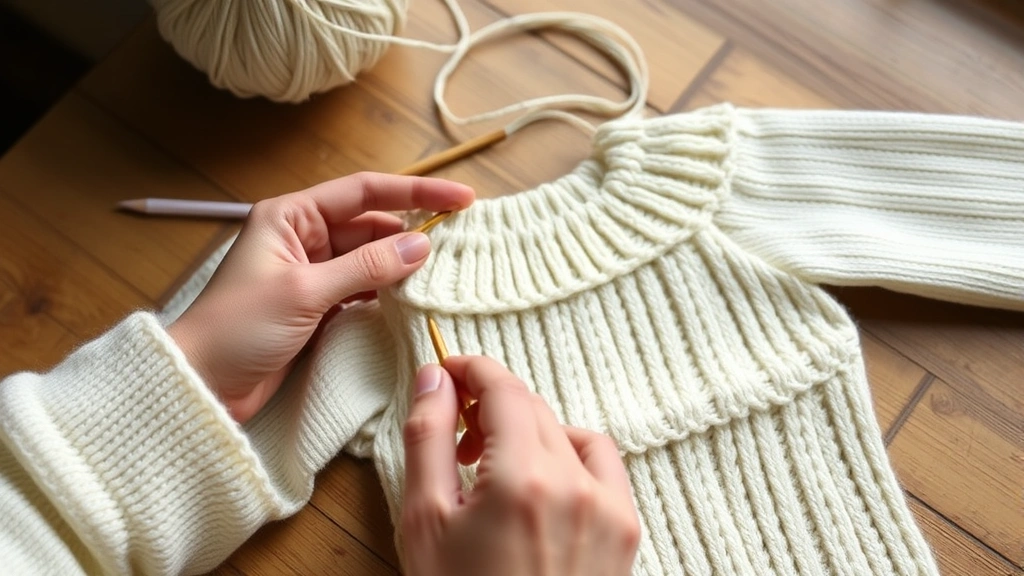
You know that feeling when you’re scrolling through Instagram and see those gorgeous crochet sweaters that look like they came straight from a boutique? I used to think those were way beyond my skill level, but here’s the thing – they’re really not as intimidating as they look. After making my fair share of wonky sleeves and questionable necklines over the years, I’ve learned that the key to a great crochet sweater isn’t some secret technique. It’s about understanding the fundamentals: picking the right pattern for your skill level, choosing yarn that behaves well, and most importantly, taking accurate measurements.
I remember my first attempt at a sweater – it was supposed to be a simple pullover, but I ended up with something that could’ve doubled as a tent. The problem wasn’t the pattern; it was that I rushed through the planning phase and didn’t really understand what I was getting into. These days, I approach sweater projects differently, and I want to share what I’ve learned so you can avoid those same frustrations.
Whether you’re eyeing your first sweater pattern or you’ve had a few attempts that didn’t quite work out, this guide will walk you through everything you need to know to create something you’ll actually want to wear. We’ll cover pattern selection, yarn choices, construction methods, and all those little details that make the difference between a homemade-looking sweater and one that gets compliments every time you wear it.
Quick Answer
Success with crochet sweaters comes down to three things: choosing a well-written pattern that matches your skill level, using the recommended yarn weight and fiber content, and making a proper gauge swatch. Start with a simple construction method like top-down or bottom-up, and always check your measurements as you go.
Choosing the Right Pattern
Let’s be honest – not all crochet patterns are created equal, and this is especially true for sweaters. I’ve learned this the hard way after purchasing patterns that looked gorgeous in photos but had instructions that were about as clear as mud. When you’re investing the time and money that goes into a sweater project, you want to start with something that sets you up for success.
Look for patterns with detailed schematics and multiple sizes. A good sweater pattern should include a schematic drawing showing all the measurements for each size. This isn’t just helpful for checking fit – it’s essential for making adjustments if needed. If a pattern only shows the finished bust measurement and nothing else, that’s a red flag.
Pay attention to the construction method described in the pattern. Top-down sweaters are generally more beginner-friendly because you can try them on as you go and make adjustments. Bottom-up construction works well too, but requires more planning. Avoid patterns that use complex construction methods like seaming multiple pieces if you’re just starting out with sweaters.
The pattern should clearly state the skill level required. If you’re new to sweater construction, stick with patterns labeled as beginner or easy intermediate, even if you’re comfortable with more complex stitches.
Read through the entire pattern before purchasing, if possible. Many designers offer a few pages as a preview. Look for clear stitch explanations, row-by-row instructions for shaping, and good organization. Patterns that jump around or assume you know techniques without explaining them will cause frustration later.
Consider the designer’s reputation too. Established designers who specialize in garments usually test their patterns more thoroughly. Check reviews if they’re available – other crocheters are pretty honest about pattern quality in their feedback.
Yarn Selection That Actually Works
Here’s where I see a lot of people go wrong: they fall in love with a yarn color and try to substitute it without considering how it’ll behave in a sweater. Yarn choice can make or break your project, and it’s not just about aesthetics.
Stick with the recommended yarn weight, at least for your first few sweaters. The pattern was designed with a specific yarn weight in mind, and substituting can throw off the drape, fit, and overall look. If the pattern calls for DK weight yarn, use DK weight yarn. I know that chunky yarn in the clearance bin looks tempting, but save it for a different project.
Fiber content matters more than you might think. Cotton yarns create structured, less stretchy garments that hold their shape well but can be less forgiving fit-wise. Wool and wool blends offer stretch and recovery, making them more comfortable to wear and easier to fit properly. Acrylic yarns have come a long way and can work well for sweaters, especially blends that include some natural fiber.
| Fiber Type | Best For | Consider This |
|---|---|---|
| 100% Cotton | Summer tops, structured sweaters | No stretch, can grow with wear |
| Wool/Wool Blend | Most sweater styles | Great drape, some stretch |
| Acrylic Blend | Everyday wear, easy care | Choose quality brands |
| Alpaca Blend | Luxury sweaters | Can be heavy, check drape |
Don’t forget to consider care requirements. If you want a sweater you can throw in the washing machine, choose yarn that’s machine washable. There’s nothing worse than spending weeks on a project only to shrink it in the first wash. I always check the yarn label for care instructions before I buy.
Buy all your yarn at once from the same dye lot. Yarn colors can vary between dye lots, and you definitely don’t want a sweater with slightly different colored sleeves. I usually buy one extra skein beyond what the pattern calls for, just in case.
Gauge and Measurements
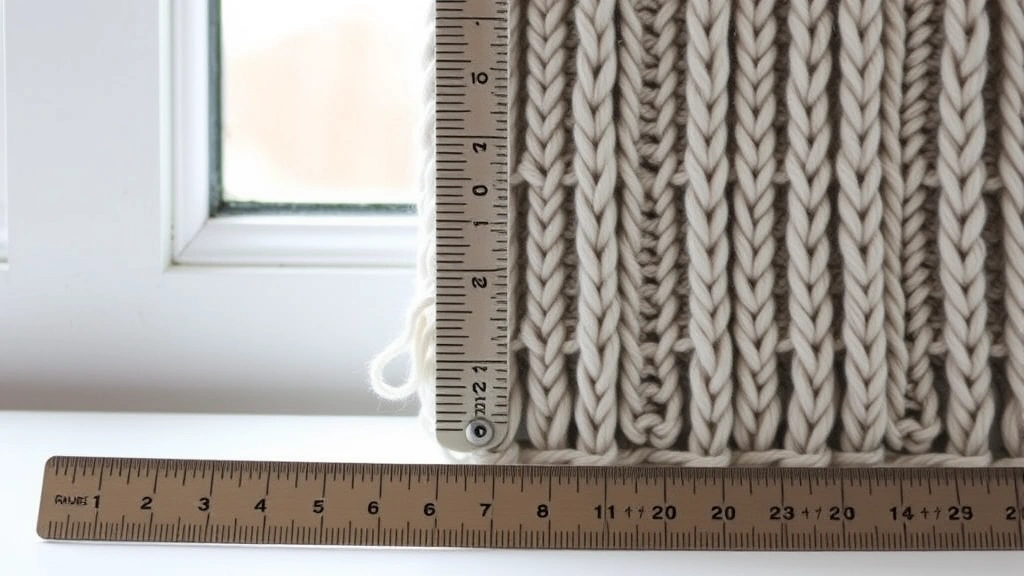
I know, I know – nobody wants to make a gauge swatch. It feels like extra work when you’re excited to start your sweater. But here’s the thing: skipping the gauge swatch is the fastest way to end up with a sweater that doesn’t fit. I learned this lesson after making a cardigan that was two sizes too big because my gauge was off.
Make your swatch with the yarn and hook you plan to use for the project, and make it in the stitch pattern specified in the pattern. A 4-inch square is usually sufficient, but some patterns call for larger swatches. Work in your normal tension – don’t try to force your stitches to match the gauge.
Measure your swatch after it’s been blocked the same way you plan to block the finished sweater. Wet blocking can significantly change the measurements, especially with natural fibers. I pin my swatch to measurements and let it dry completely before measuring.
Pro tip: If your gauge is off, don’t just change hook sizes randomly. Go up or down one hook size at a time and make a new swatch. Sometimes a half-size difference in hook makes all the difference.
Taking accurate body measurements is just as important as getting gauge right. You’ll need bust, waist, hip, arm length, and torso length measurements at minimum. Measure over the type of clothing you plan to wear under the sweater – measurements over a fitted t-shirt will be different than over a tank top.
Add ease appropriately. Most sweater patterns include ease (extra room for comfort and movement) in their measurements, but the amount varies. A fitted sweater might have 1-2 inches of positive ease, while an oversized style could have 6-8 inches or more. Understanding how much ease is built into your chosen size helps you select the right fit.
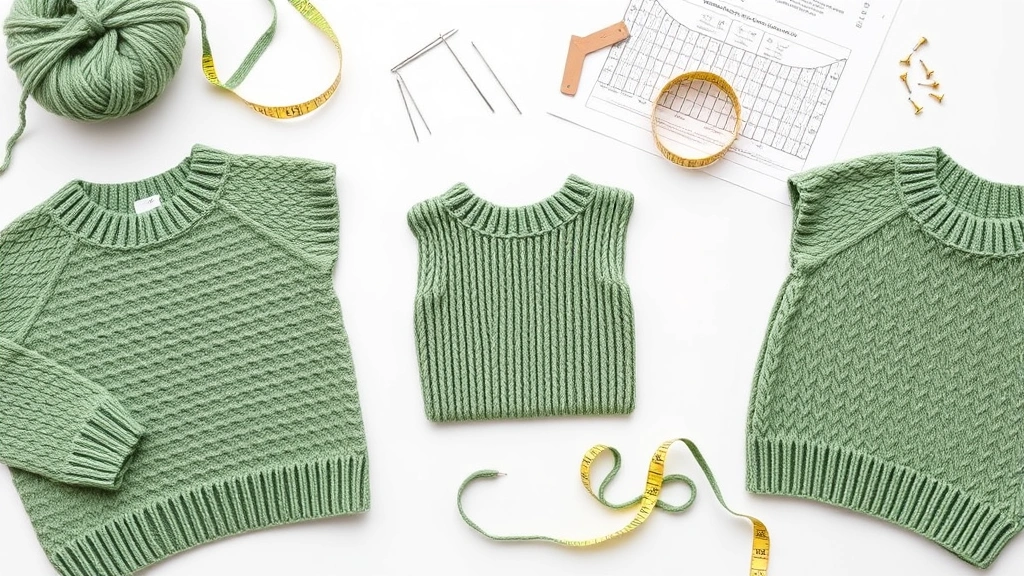
Construction Methods Explained
The way a sweater is constructed affects both how you make it and how it fits when finished. Understanding the basic construction methods helps you choose patterns that match your comfort level and preferences.
Top-down construction starts at the neckline and works down to the hem. This method is great for beginners because you can try on the sweater as you work and make adjustments to length easily. The yoke (shoulder area) is usually worked in one piece, then divided for the body and sleeves. Many raglan-style sweaters use this construction method.
Bottom-up construction starts at the hem and works up to the shoulders. This traditional method often involves making the back and front pieces separately, then joining them at the shoulders. Sleeves are typically made separately and either seamed on or picked up and worked from the armhole. This method requires more planning but can result in a very polished finished garment.
Seamless construction eliminates most or all seaming by working pieces in the round or joining them as you go. This can be faster than seamed construction, but requires careful attention to shaping and fit. Some crocheters love the smooth finish of seamless garments, while others prefer the structure that seams provide.
Choose a construction method that matches your experience level. If you’ve never made a sweater before, top-down raglan construction is usually the most forgiving.
Modular construction involves making separate motifs or sections that are joined together to create the sweater shape. This method works well for granny square sweaters or other geometric designs. It’s portable and allows you to work on small sections at a time, but requires careful planning to get the fit right.
Making It Fit Right
Even with perfect gauge and accurate measurements, you might need to make adjustments for the best fit. Understanding how to modify patterns isn’t as scary as it sounds, and small changes can make a huge difference in how your finished sweater looks and feels.
Length adjustments are the easiest modifications to make. For body length, simply work more or fewer rows before starting any waist shaping or armhole shaping. Keep track of your row count so you can match it on other pieces if needed. Sleeve length can be adjusted the same way – just remember that changing sleeve length affects how much yarn you’ll need.
Width adjustments are trickier but definitely doable. If you need to go up or down one size, you can often adjust the stitch count by adding or subtracting stitches in multiples of the stitch repeat. For example, if the pattern uses a stitch repeat of 4, you could add or subtract 4, 8, or 12 stitches to change the width.
Armhole depth is crucial for comfort but often overlooked. If you have long arms or a long torso, you might need deeper armholes than the pattern provides. Measure from your shoulder point down to where you want the armhole to end, and compare this to the pattern schematic.
Fit tip: Try on your sweater frequently as you work, especially around the armholes and neckline. It’s much easier to make adjustments as you go than to fix problems after the sweater is complete.
Neckline fit is another area where small adjustments make a big impact. If you prefer higher or lower necklines than what’s shown in the pattern, you can usually add or subtract a few rows. For scooped necklines, you might need to adjust the shaping curve as well.
Avoiding Common Mistakes
After making quite a few sweaters (and making most of these mistakes myself), I’ve noticed some patterns in what goes wrong. The good news is that most of these issues are preventable if you know what to watch for.
Rushing through the foundation chain or starting ring is a big one. I see so many sweaters that look great everywhere except the very beginning, where the foundation is too tight or uneven. Take your time with this part – it’s the foundation for everything else. If you’re working foundation single crochet, keep your tension consistent throughout.
Not checking your work regularly leads to problems that compound over time. I make it a habit to lay my work flat and check the shape every few inches. This is especially important around increases and decreases, where small errors can throw off the entire silhouette.
Ignoring the pattern’s blocking instructions is another common mistake. Different stitch patterns and yarn fibers respond differently to blocking, and the designer chose their blocking method for a reason. If the pattern calls for wet blocking, don’t just steam it and call it good.
Inconsistent tension throughout the project creates an uneven finished garment. This is especially noticeable in sweaters because of the large surface area. If you notice your tension changing (maybe you’re more relaxed after a few rows, or you’re rushing to finish), take a break and reset.
Keep notes as you work, especially if you make any modifications. You’ll thank yourself later when you’re working the second sleeve and can’t remember exactly what you did on the first one.
Not planning for yarn needs causes panic buying and potential dye lot issues. Calculate how much yarn you’ll need for any modifications before you start, and buy it all at once if possible.
Professional Finishing
The difference between a homemade-looking sweater and one that looks store-bought often comes down to the finishing details. These techniques take a little extra time, but they’re worth it for the professional results.
Proper seaming makes a huge difference in how your sweater looks and wears. If your pattern requires seaming, don’t rush through this step. Use a mattress stitch for side seams – it creates an invisible join that’s also stretchy and comfortable. Take your time to match up rows and keep your seaming tension consistent.
Blocking your finished pieces before seaming helps everything line up properly and gives your sweater a polished look. Pin each piece to the measurements given in the pattern schematic, not just to whatever size they happen to be. This step can correct minor shaping issues and even out your stitch tension.
Edge finishing can make or break the look of your sweater. Necklines, armholes, and hems all benefit from proper edge treatment. Single crochet edging is the most common, but make sure you’re picking up stitches evenly to avoid puckering or stretching. For ribbed edges, consider using a post stitch ribbing technique for a more elastic finish.
Weaving in ends properly ensures your sweater will hold up to wear and washing. Don’t just weave ends back and forth a few times and call it done. Work them through several stitches in different directions, and trim close to the fabric only after you’re sure they’re secure.
Finishing tip: Steam lightly after seaming to help the seams settle and lay flat. Use a pressing cloth and don’t put the full weight of the iron on your work.
Consider adding stabilization to areas that get stress, like shoulder seams. A length of ribbon or twill tape sewn into the shoulder seam can prevent stretching over time, especially in heavier sweaters or those made with yarns that don’t have much recovery.
Common Questions
How much yarn do I need for a crochet sweater?
Yarn requirements vary widely based on size, style, and yarn weight. A basic adult pullover in worsted weight typically needs 1200-1800 yards, while a cardigan might need 1500-2200 yards. Always buy 10-15% more than the pattern calls for to account for gauge differences and potential modifications. Check the pattern’s yarn requirements for your specific size.
Can I substitute a different yarn weight?
It’s possible but not recommended for beginners. Changing yarn weight affects the entire structure and fit of the garment. If you must substitute, stay within the same weight category (don’t swap DK for worsted) and make a large gauge swatch first. You’ll likely need to recalculate stitch counts and possibly choose a different size.
How long does it take to crochet a sweater?
A simple pullover typically takes 40-80 hours of active crocheting time, depending on size, complexity, and your speed. Spread over several weeks or months, this might mean 2-3 months of casual evening crocheting. Complex patterns with intricate stitch work or colorwork can take significantly longer. Factor in time for gauge swatching, blocking, and finishing too.
What’s the best stitch for a beginner sweater?
Single crochet and half double crochet are excellent choices for first sweaters. They create stable, even fabric that’s easy to work with and forgiving of tension variations. Double crochet works well too but creates a more open fabric. Avoid complex stitch patterns until you’re comfortable with basic sweater construction.
Should I make the sleeves first or last?
This depends on your construction method, but I usually recommend making sleeves last. Work the body first so you can check the fit around the torso and armholes. If you need to make adjustments to the body, it might affect sleeve measurements. Plus, having the body done gives you motivation to finish the sleeves.
How do I know if my sweater will fit before it’s finished?
Try it on frequently, especially around key fit points like the bust, armholes, and neckline. Lay the piece flat and compare measurements to the pattern schematic. For top-down construction, you can literally put it on as you work. Keep a measuring tape handy and check your progress against the pattern measurements regularly.
What if I run out of yarn in a different dye lot?
Try to use the new dye lot in a less visible area like the back or underside of sleeves. Alternate between old and new yarn every few rows to create a gradual transition that’s less noticeable. Some crocheters intentionally plan for this by using a contrast color for cuffs, hem, or other design elements.
Can I fix mistakes after the sweater is finished?
Minor issues like uneven edges can often be fixed with blocking or adding trim. Fit problems are harder to correct after completion. Length can sometimes be adjusted by adding or removing rows at hems or cuffs. Major structural issues usually require significant reconstruction. This is why checking your work regularly as you go is so important.
Making your first crochet sweater is definitely a milestone in your crocheting journey, and I hope this guide helps you feel more confident about tackling one. Remember, even experienced crocheters sometimes end up with sweaters that don’t fit quite right – it’s all part of the learning process. The important thing is to start with a good pattern, take your time with the preparation steps, and enjoy the process.
Your first sweater might not be perfect, but it’ll be yours, and there’s something pretty special about wearing something you made with your own hands. Plus, each sweater you make teaches you something new, so the next one will be even better. Take notes, be patient with yourself, and don’t be afraid to ask for help in online crochet communities if you get stuck. Happy crocheting!