You know that sinking feeling when you’re halfway through a gorgeous granny square project and realize you’ve been crocheting them all slightly different sizes? Or worse, you finish a beautiful blanket only to discover the squares won’t lie flat together. I’ve been there, and it’s frustrating enough to make you want to stuff the whole project in a drawer.
Here’s the thing about granny squares – they look deceptively simple, but getting them consistently sized requires more than just following a pattern. After making hundreds (maybe thousands?) of these little beauties over the years, I’ve learned that the secret isn’t just in your stitches – it’s in understanding how yarn choice, hook size, tension, and even blocking can dramatically affect your final measurements.
Whether you’re a beginner wondering why your squares look wonky or an experienced crocheter troubleshooting size inconsistencies, getting your granny squares the right size is totally doable once you know what affects the dimensions. The good news? Most sizing issues have simple solutions that don’t require starting over.
Quick Answer
Standard granny squares typically measure 3-4 inches, but size depends on yarn weight, hook size, and tension. Use a gauge swatch to test your measurements, and adjust your hook size up or down to achieve your desired dimensions.
Standard Granny Square Sizes
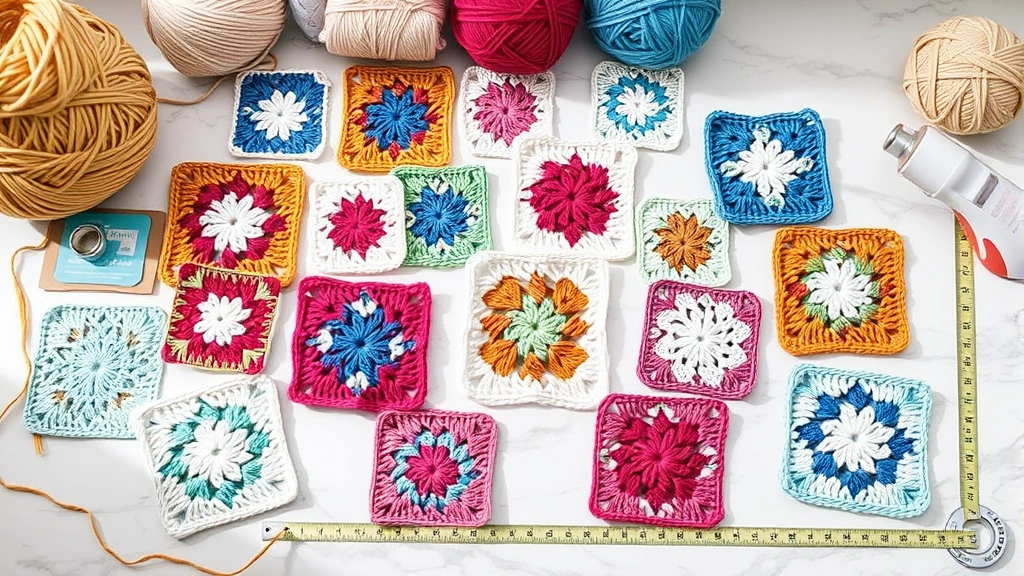
Most traditional granny square patterns are designed to create squares that measure between 3 and 4 inches when made with worsted weight yarn and an appropriate hook size. This “standard” size works well for afghans, bags, and most home decor projects.
However, granny squares can range from tiny 1-inch versions perfect for dollhouse accessories to massive 12-inch squares that become statement pieces on their own. The size you choose depends entirely on your project’s needs.
Common Size Categories
| Size Category | Typical Measurement | Best Uses | Yarn Weight |
|---|---|---|---|
| Mini | 1-2 inches | Coasters, appliques, jewelry | Thread, fingering |
| Small | 2-3 inches | Baby items, delicate projects | Sport, DK |
| Standard | 3-4 inches | Afghans, bags, scarves | Worsted |
| Large | 5-7 inches | Pillows, wall hangings | Chunky |
| Oversized | 8+ inches | Statement pieces, rugs | Super chunky |
I’ve found that 3.5-inch squares hit the sweet spot for most blanket projects. They’re large enough to show off your color work but small enough that you don’t get bored making individual squares. Plus, they math out nicely for standard afghan dimensions.
Pro tip: Before committing to a large project, make at least three squares in your chosen yarn and hook combination. This gives you a realistic average size and helps you spot any consistency issues early.
What Affects Granny Square Size
Understanding what influences your square size is crucial for consistent results. It’s not just about following the pattern – several factors can make your squares larger or smaller than expected.
Yarn Weight and Fiber Content
Yarn weight is probably the biggest factor in determining square size. A pattern written for worsted weight yarn will create dramatically different results if you use DK weight yarn or chunky yarn instead.
But here’s what many crocheters don’t realize: fiber content matters too. Cotton yarn typically creates slightly smaller, denser squares compared to acrylic or wool of the same weight. Yarns with stretch (like those containing elastane) can also affect your final measurements.
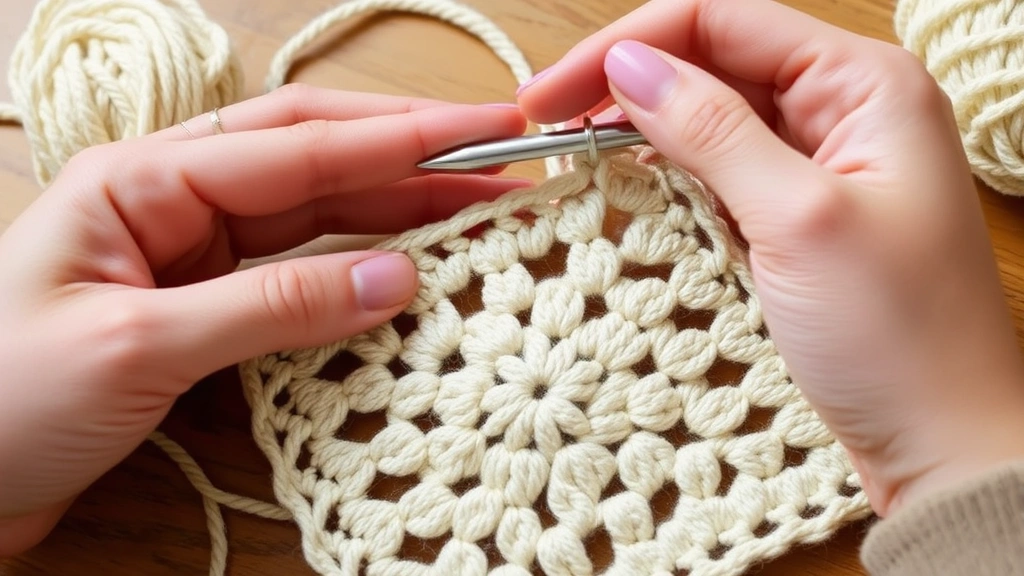
Hook Size Impact
Your hook size directly correlates to square size, but the relationship isn’t always linear. Generally, going up one hook size increases your square by about 1/4 to 1/2 inch, but this varies based on your natural tension and the yarn you’re using.
I keep a range of hook sizes handy when starting any granny square project. If my gauge square comes out too small, I’ll try the next size up. Too large? Down a size I go.
Personal Tension
This is where things get personal. Some crocheters naturally work tightly, creating smaller, denser squares. Others have a looser hand, resulting in larger, more open squares. Neither is wrong – it’s just your natural style.
Your tension can also change based on your mood, the time of day, or even what you’re watching on TV. I’ve noticed my evening squares tend to be slightly looser than my morning ones when I’m more focused.
“I learned to make a few practice squares whenever I pick up a project after a break. It helps me get back into the rhythm and ensures my tension stays consistent.” – Sarah, experienced crocheter
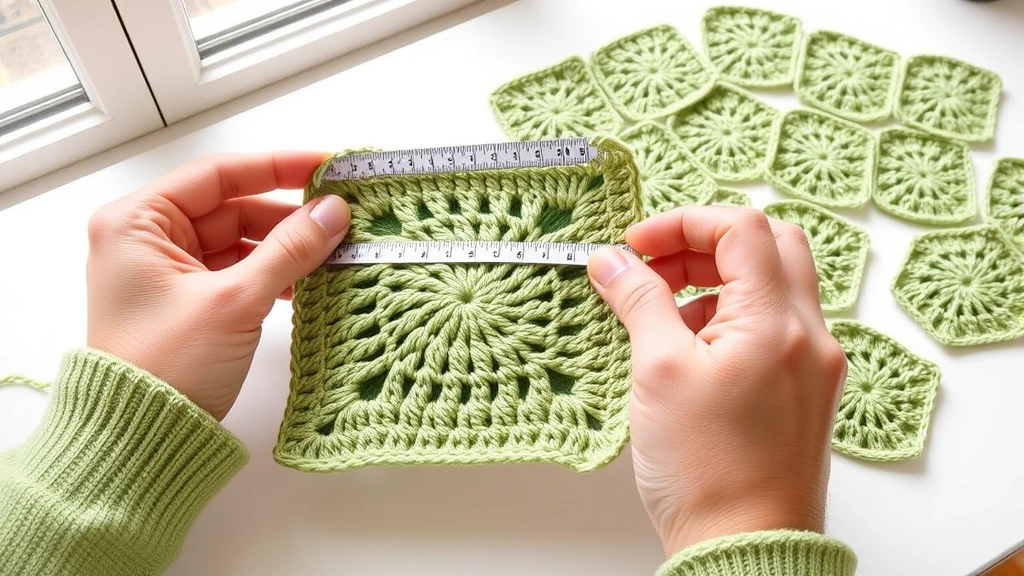
How to Measure Your Squares
Accurate measuring is essential for consistent results, but there’s a right way and a wrong way to measure granny squares. Many crocheters measure incorrectly, leading to frustration when squares don’t fit together properly.
The Right Way to Measure
Always measure your squares after they’ve had time to relax but before blocking. Lay the square flat on a hard surface – not on your lap or a soft cushion. Use a ruler or measuring tape, and measure from the outside edge of one corner stitch to the outside edge of the opposite corner stitch.
Don’t stretch or compress the square while measuring. Let it lie naturally. If your square is slightly rectangular rather than perfectly square, measure both directions and note the difference.
When to Measure
I recommend measuring at three different stages:
- Immediately after completion: This gives you the “fresh” measurement
- After 24 hours: Yarn often relaxes and settles, changing the size slightly
- After blocking: This is your final, working measurement
Keep a simple log of these measurements, especially when working on large projects. It might seem excessive, but it saves headaches later when you’re trying to figure out why some squares seem different.
Measuring tip: Take photos of your ruler next to completed squares. This creates a visual record that’s helpful when you’re working on a project over several months.
Adjusting Size Through Hook and Yarn Changes
When your squares aren’t the size you need, you have several adjustment options. The key is making systematic changes rather than random guesses.
Hook Size Adjustments
This is usually your first line of defense. Here’s what I’ve learned about hook size changes:
- One size up: Increases square size by roughly 1/4 inch
- Two sizes up: Increases by 1/2 to 3/4 inch
- One size down: Decreases by roughly 1/4 inch
- Two sizes down: Decreases by 1/2 to 3/4 inch
These are general guidelines – your mileage may vary based on yarn and personal tension. Always test with a sample square before committing to a full project.
Yarn Substitutions
Sometimes switching yarns is the better solution, especially if hook adjustments create fabric that’s too loose or too tight for your project’s intended use. Worsted weight yarn offers the most flexibility for standard-sized squares.
When substituting yarns, pay attention to both weight and fiber content. A cotton worsted weight yarn will behave differently than an acrylic worsted weight, even with the same hook size.
Pattern Modifications
For more dramatic size changes, you might need to modify the pattern itself. Adding or removing rounds is the most straightforward approach:
- Adding rounds: Each additional round typically adds 1/2 to 3/4 inch to the overall size
- Removing rounds: Take away the last round or two for smaller squares
- Adjusting corner chains: Changing corner chain spaces from ch-2 to ch-1 or ch-3 affects size
Troubleshooting Common Size Problems
Even experienced crocheters run into sizing issues. Here are the most common problems I see and their solutions.
Squares Getting Progressively Larger
This usually happens when you’re working on a long project and your tension gradually loosens as you get more comfortable with the pattern. The solution? Check your gauge every 10-15 squares and adjust if needed.
I keep my first few completed squares nearby as reference points. If I notice my current squares are noticeably different, I’ll take a break and come back with fresh focus.
Inconsistent Corner Sizes
If your squares measure differently along different edges, you likely have inconsistent corner tension. This is especially common with solid granny squares where corners are more prominent.
Practice making your corner chain spaces exactly the same each time. Count your chains carefully and maintain consistent tension through the corner stitches.
Squares That Won’t Lie Flat
Cupping or ruffling usually indicates tension issues. Cupping (edges curling up) suggests your tension is too tight, while ruffling (edges wavy) indicates tension that’s too loose.
Try adjusting your hook size first. If that doesn’t help, pay attention to your chain spaces – they might be too tight or too loose compared to your double crochet stitches.
Remember: it’s better to have slightly imperfect but consistent squares than to have a few “perfect” squares that don’t match the rest of your project.
Using Blocking to Perfect Your Size
Blocking can be a game-changer for granny square sizing, especially when you need to fine-tune measurements or correct minor shape issues. It’s not magic, but it can help achieve that professional, polished look.
Steam Blocking for Acrylic Yarns
Most acrylic yarns respond well to steam blocking. Hold a steam iron about 6 inches above your squares and let the steam relax the fibers. Then gently shape the square to your desired dimensions while it’s still warm and slightly damp.
Be careful not to let the iron touch acrylic yarn directly – it can melt or become permanently distorted. I learned this the hard way on a beautiful granny square blanket years ago.
Wet Blocking for Natural Fibers
Cotton, wool, and other natural fibers usually respond better to wet blocking. Soak your completed squares in cool water for about 15 minutes, then gently squeeze out excess water (don’t wring!) and pin them to your desired measurements on a blocking board.
Let them dry completely before removing the pins. This method can help you achieve very precise measurements and is especially useful for squares that need to fit together perfectly.
Blocking Limitations
Blocking can typically adjust square size by about 1/4 to 1/2 inch in either direction, but it won’t turn a 3-inch square into a 5-inch square. If you need dramatic size changes, go back to hook and yarn adjustments instead.
Planning Projects with Consistent Sizing
Smart planning prevents most sizing headaches. Here’s how I approach projects that require multiple squares of consistent size.
Create a Master Gauge Square
Before starting any multi-square project, create what I call a “master gauge square.” This becomes your template for all subsequent squares. Keep it handy throughout your project for regular comparison.
Write down everything about this square: yarn brand and color, hook size, number of rounds, and final measurements after blocking. This information becomes invaluable if you need to take a break from the project or if you run out of yarn and need to substitute.
Batch Your Squares
Instead of making squares one at a time over months, try batching them. Make 10-20 squares in one sitting when your tension and rhythm are consistent. This approach works especially well for granny square afghans where uniformity is important.
If you’re making squares in different colors, complete all squares of one color before moving to the next. This ensures color consistency within each batch.
Quality Control Checkpoints
Set regular checkpoints throughout your project. Every 15-20 squares, lay them out together and check for size consistency. It’s much easier to adjust a few outliers than to discover major inconsistencies when you’re ready to join everything together.
Project tip: Take progress photos showing your squares laid out together. These photos make it easier to spot size inconsistencies that might not be obvious when looking at individual squares.
Common Questions
How do I know if my granny squares are the right size?
Your squares are the right size if they match your project requirements and are consistent with each other. For most blanket projects, squares should measure within 1/8 inch of each other. Use your pattern’s recommended gauge as a starting point, but adjust based on your actual measurements.
Can I mix different sized granny squares in one project?
Yes, but it requires careful planning. You can create interesting designs by intentionally using different sized squares, but you’ll need to plan how they’ll fit together. Consider using partial squares or rectangles to fill gaps, or embrace an asymmetrical design.
Why do my granny squares keep getting bigger as I work?
This usually happens because your tension loosens as you get comfortable with the pattern. Take breaks every hour or so to check your gauge against your original square. Some crocheters find that switching to a slightly smaller hook partway through helps maintain consistency.
How much yarn do I need for a 4-inch granny square?
A typical 4-inch granny square made with worsted weight yarn uses approximately 15-20 yards of yarn. This varies based on the specific pattern, yarn brand, and your tension. Always buy extra yarn – it’s better to have leftovers than to run short with a dye lot mismatch.
Should I block every single granny square?
For most projects, blocking individual squares isn’t necessary if they’re already the right size and shape. However, blocking becomes important if your squares are slightly different sizes or if they don’t lie flat. You can also block the entire finished project instead of individual squares.
What’s the best way to store granny squares while working on a large project?
Store completed squares flat in a box or large zippered bag to prevent stretching or distortion. Avoid hanging them or storing them in a way that puts weight on individual squares. Some crocheters organize squares by color in separate containers to make assembly easier.
How do I fix a granny square that’s too small without starting over?
Add another round or two to increase the size. Choose colors that complement your existing square – you can even turn this into a design feature by adding a contrasting border. If the square is significantly too small, it might be easier to start over with a larger hook.
Can I use different yarn weights in the same granny square project?
While possible, mixing yarn weights in the same project requires careful planning and usually results in different sized squares. If you want to use different weights, consider making them into separate design elements rather than trying to make them all the same size. Cotton yarns of different weights can work together if you adjust hook sizes appropriately.
Perfect Squares Every Time
Getting consistent granny square sizes isn’t about perfection – it’s about understanding the factors that affect your results and making intentional adjustments. Your yarn choice, hook size, and personal tension all play roles, but with a little attention to gauge and some simple troubleshooting techniques, you can create beautifully uniform squares every time.
Remember that slight variations actually add character to handmade projects. Don’t stress over tiny differences that only you will notice. Focus on consistency within your own work, and you’ll create projects you’re proud to use and share.
The most important thing? Keep making squares. Each one teaches you something about your technique and brings you closer to that perfect, consistent rhythm that makes granny square projects such a joy to create. Happy crocheting!