You’ve been crocheting for a while now, and you keep hearing about this thing called “blocking.” Maybe you’ve seen those mysterious photos of wet sweaters pinned to boards, or read pattern instructions that casually mention “block to measurements.” If you’re like I was a few years ago, you might be wondering if blocking is really necessary or just another crafty step you can skip.
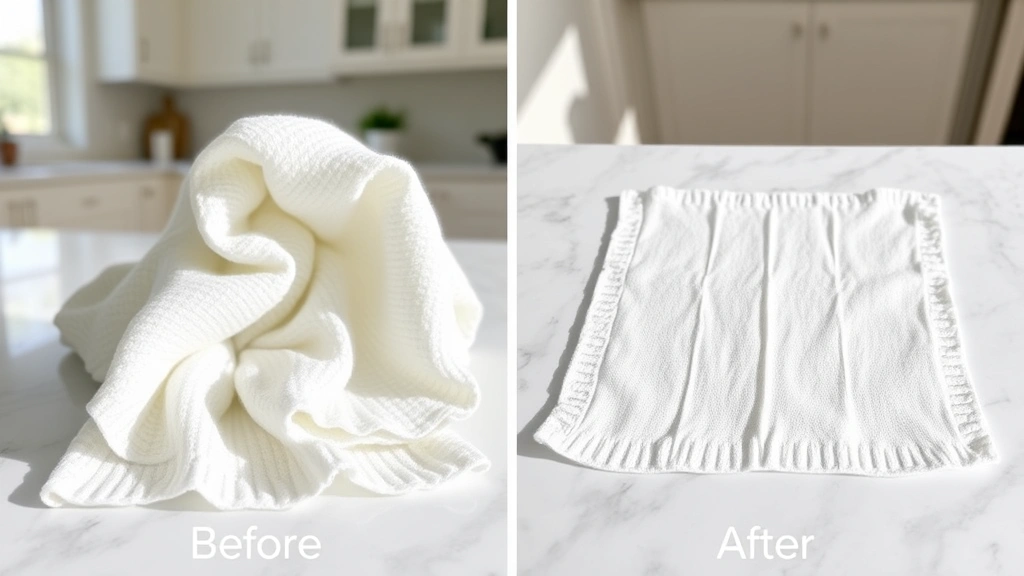
Here’s the thing: I used to think blocking was optional too. Then I made my first lace shawl, and it looked like a crumpled dishrag straight off the hook. After blocking it properly, the transformation was incredible – delicate stitches opened up, the edges lay flat, and suddenly my project looked professional instead of homemade.
Blocking isn’t just for fancy projects either. That granny square blanket you’re working on? It’ll lie flatter and look more polished. Those edges that keep curling on your dishcloths? Blocking fixes that too. Even simple projects benefit from this finishing technique that takes your crochet from “pretty good” to “wow, did you really make that?”
Quick Answer
Blocking is a finishing technique that uses moisture and gentle stretching to shape your crochet projects, making stitches more even and helping pieces lay flat. Most projects benefit from at least light blocking, especially lace, garments, and anything with edges that curl or don’t lie flat properly.
What Is Blocking and Why Does It Matter?
Blocking is essentially giving your finished crochet project a spa day. You’re using moisture and gentle manipulation to coax your stitches into their best possible shape. Think of it like ironing a wrinkled shirt – you’re not changing the fundamental structure, just helping everything settle into place properly.
When you crochet, your yarn gets twisted and compressed as you work. Your tension might vary slightly from stitch to stitch, and the natural properties of the yarn can cause edges to curl or pull. Blocking addresses all of these issues by relaxing the fibers and allowing them to settle into their intended shape.
The science behind it is pretty straightforward. Most yarns have some natural elasticity, and when you add moisture, those fibers become more pliable. This is especially true for natural fibers like wool, which has tiny scales that can shift and lock into new positions when wet and dried.
I learned this lesson the hard way with my first cardigan pattern. The pieces looked wonky and uneven before blocking, but afterward, they matched the schematic perfectly.
Even synthetic yarns benefit from blocking, though they won’t change as dramatically as natural fibers. Acrylic yarn, for instance, can be “killed” with steam to make it softer and help it hold its shape better. This technique is particularly useful for projects where you want a more drapey feel.
The visual difference blocking makes is often stunning. Lace patterns that look like tangled messes suddenly reveal their intricate designs. Complex stitch patterns become more defined and uniform. Even basic single crochet projects look more professional with properly blocked edges.
When Your Projects Need Blocking
Not every project requires blocking, but more benefit from it than you might think. Here’s when blocking moves from “nice to have” to “absolutely necessary.”
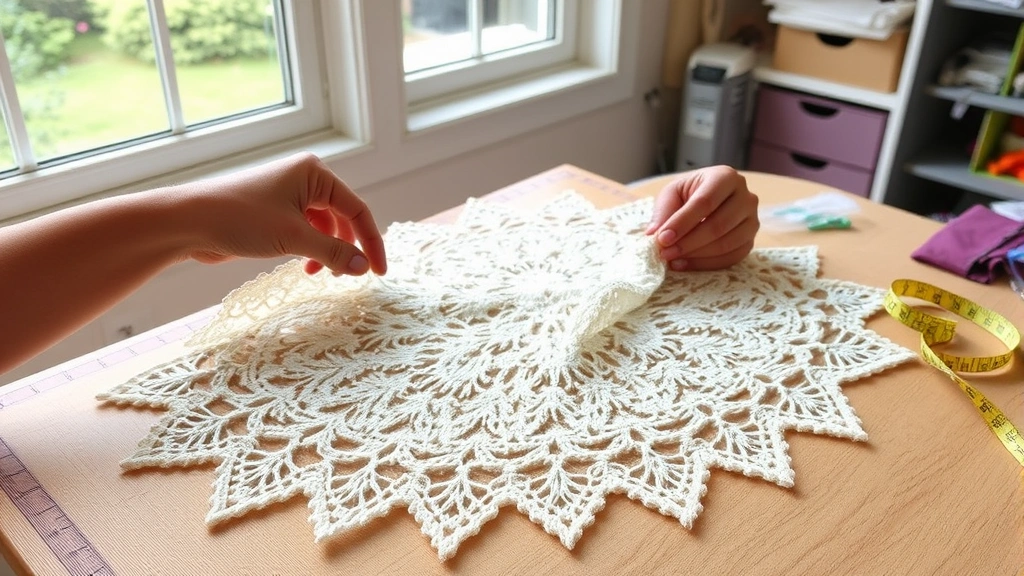
Lace projects are the poster children for blocking. That delicate shawl or doily simply won’t look right without proper blocking. The openwork patterns need to be stretched to show their full beauty, and blocking opens up those spaces between stitches that create the lacy effect.
Garments almost always need blocking, especially if you want them to fit properly. When you’re making a sweater or cardigan, blocking helps ensure all your pieces are the correct size and shape before you seam them together. I’ve seen too many crocheters skip this step and end up with sleeves that are too short or fronts that don’t match.
| Project Type | Blocking Priority | Best Method |
|---|---|---|
| Lace shawls/doilies | Essential | Wet blocking |
| Garments | Highly recommended | Wet or steam |
| Blankets/afghans | Recommended | Spray or wet |
| Dishcloths | Helpful | Spray blocking |
| Amigurumi | Usually unnecessary | Light steam if needed |
Blankets and afghans benefit from blocking too, especially if you’re joining squares or working in sections. Blocking helps everything line up properly and creates clean, straight edges. Even a simple single crochet throw looks more polished when the edges lie flat instead of curling.
Projects with texture or colorwork often look better blocked. The cables and raised stitches become more defined, and color changes look cleaner when the fabric is properly shaped.
Signs Your Project Needs Blocking
Sometimes it’s obvious – your lace looks like a hot mess or your sweater pieces don’t match the pattern measurements. But other signs are subtler:
- Edges that curl or won’t lie flat
- Uneven stitch definition
- Fabric that feels stiff or compressed
- Pieces that don’t match pattern dimensions
- Seams that pucker or pull
Three Main Blocking Methods
There are three main ways to block your crochet projects, each with its own advantages. The method you choose depends on your yarn fiber, the project type, and how much time you have.
Wet Blocking
This is the most thorough method and works best for natural fibers like wool, cotton, and linen. You completely saturate the project with water, then pin it out to dry in the correct shape. It’s time-consuming but gives the most dramatic results.
Steam Blocking
Perfect for delicate fibers or when you need a gentler approach. You use steam to add moisture without fully wetting the project. This method works well for wool blends and some synthetics, but be careful with temperature-sensitive fibers.
Spray Blocking
The quickest method – you lightly mist the project with water and pin it out. It’s great for touch-ups or projects that don’t need dramatic reshaping. This works well for cotton and acrylic projects.
I use different methods for different situations. For my wool shawls, I always wet block because the results are so much better. For quick fixes on dishcloths or when I’m in a hurry, spray blocking does the job just fine.
Wet Blocking Step-by-Step
Wet blocking gives you the most control and the best results, especially for projects made with natural fibers. Here’s how to do it properly without damaging your work.
- Prepare Your Workspace
You’ll need a flat surface larger than your project. Blocking mats are ideal, but you can use a spare bed, carpeted floor, or even large towels on a table. Make sure the surface is clean and won’t stain your project.
- Soak Your Project
Fill a clean basin with lukewarm water. If you’re working with wool, add a small amount of wool wash like Eucalan or Soak. Gently submerge your project and let it soak for 15-30 minutes. Don’t agitate or rub – just let it sit.
- Remove Excess Water
Carefully lift the project out (support heavy pieces from underneath) and gently squeeze out excess water. Never wring or twist. For large projects, you can roll them in a clean towel and press to remove more water.
- Pin to Shape
Lay your project on your blocking surface and gently stretch it to the correct measurements. Use rust-proof pins or blocking wires for straight edges. For lace, pin out each point individually to open up the pattern.
- Let It Dry Completely
This is the hardest part – waiting! Depending on your climate and the yarn weight, it can take 12-48 hours. Don’t move or unpin until it’s completely dry, or you’ll lose the blocking effect.
The key to successful wet blocking is patience. I know it’s tempting to check if it’s dry every few hours, but resist the urge. That baby blanket will hold its shape much better if you let it dry thoroughly.
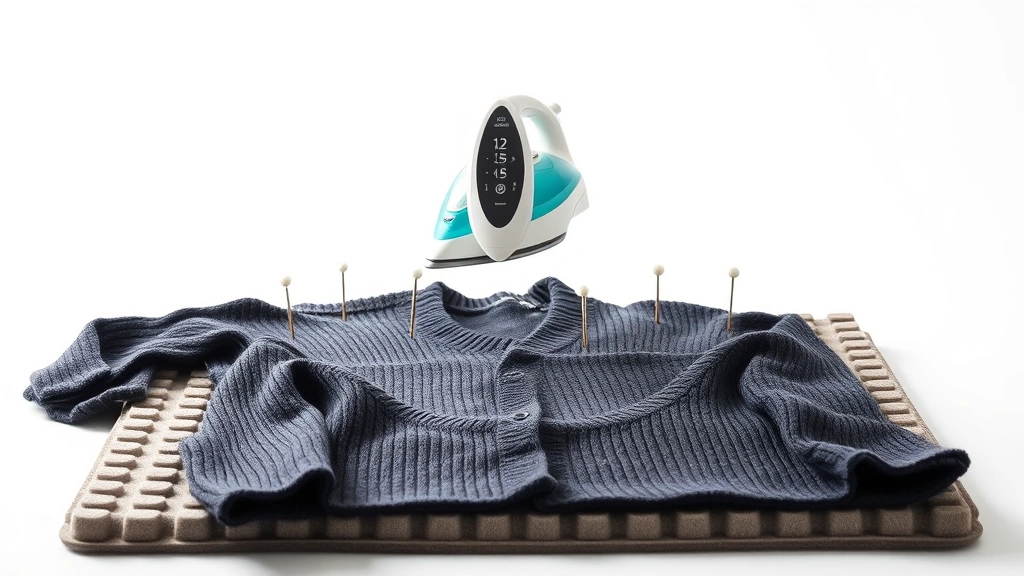
Steam Blocking for Delicate Fibers
Steam blocking is my go-to method for wool blends and when I need to be extra gentle. It’s also faster than wet blocking, though not quite as dramatic in its effects.
You’ll need a good steam iron or garment steamer for this method. The key is using steam without letting the iron touch your project directly – you’re essentially giving your crochet a steam bath.
Start by pinning your project to the correct measurements on your blocking mat. Hold your iron about an inch above the surface and let the steam penetrate the fibers. Work systematically across the entire piece, spending extra time on areas that need more shaping.
For synthetic yarns like acrylic, you can use a technique called “killing” the acrylic. This involves using more heat and steam to permanently relax the fibers, making them softer and more drapey. Be very careful with temperature – too much heat can melt synthetic fibers.
I learned about killing acrylic when working on lightweight shawl patterns with budget yarn. The transformation is remarkable – scratchy acrylic becomes soft and flowing.
Steam blocking works particularly well for textured stitches and cables. The steam helps define the raised elements while smoothing the background fabric. It’s also great for refreshing projects that have been stored and gotten a bit wrinkled.
Quick Spray Blocking Method
When you need results fast or you’re dealing with a project that doesn’t need major reshaping, spray blocking is your friend. It’s perfect for cotton dishcloths, acrylic throws, or touching up edges that have gotten a bit wonky.
Pin your project to the correct shape first, then use a spray bottle filled with clean water to lightly mist the entire surface. You want it damp, not soaking. Pay extra attention to problem areas like curling edges or uneven stitches.
This method works especially well for geometric patterns like granny squares where you need the edges to lie flat but don’t need dramatic reshaping. It’s also great for final touch-ups after seaming garment pieces together.
The drying time is much shorter with spray blocking – usually just a few hours depending on your climate. This makes it perfect when you’re on a deadline or want to gift something the same day you finish it.
Essential Blocking Supplies
You don’t need a lot of fancy equipment to start blocking, but having the right supplies makes the process much easier and more effective.
Blocking Mats
Interlocking foam mats are the gold standard. They’re lightweight, portable, and you can configure them to fit any project size. The grid lines help with measuring, and they’re easy to store. You can find good sets from companies like KnitPro or make do with children’s play mats from the dollar store.
Pins and Wires
Rust-proof pins are essential – regular pins can leave stains on your beautiful work. T-pins work well for most projects, but blocking wires are game-changers for straight edges. They help create perfectly straight lines and reduce the number of pins you need.
Measuring Tools
A good tape measure and ruler are crucial for getting your measurements right. I also keep a notebook specifically for recording blocking measurements – it’s incredibly helpful for future projects.
| Supply | Essential? | Cost Range |
|---|---|---|
| Blocking mats | Yes | $20-60 |
| Rust-proof pins | Yes | $10-20 |
| Blocking wires | Helpful | $15-30 |
| Spray bottle | Yes | $2-5 |
| Wool wash | For wool projects | $8-15 |
You can start with basic supplies and upgrade as you do more blocking. I began with towels on my guest bed and cheap pins from the craft store. As I got more serious about finishing my projects properly, I invested in better equipment.
Blocking Mistakes to Avoid
I’ve made most of these mistakes myself, so learn from my errors and save yourself some frustration.
Using the Wrong Temperature
This is especially important with synthetic yarns. Too much heat can melt or permanently damage acrylic and other synthetic fibers. Always test on a swatch first if you’re unsure.
Not Supporting Heavy Projects
When moving a wet blanket or large garment, support it from underneath. The weight of the water can stretch the fabric beyond repair if you lift it by the edges.
I learned this lesson with a king-size afghan that ended up with permanently stretched edges because I didn’t support it properly when moving it from the sink to the blocking area.
Rushing the Drying Process
I know it’s tempting to speed things up with a fan or hair dryer, but let your projects dry naturally. Forced drying can cause uneven results and might not set the blocking properly.
Over-stretching
More isn’t always better. Stretching too aggressively can distort your stitches permanently. Follow your pattern measurements, and if something seems off, double-check your gauge instead of forcing the fabric to fit.
Common Questions
Do I need to block every crochet project?
Not every project requires blocking, but most benefit from at least light blocking. Amigurumi and heavily textured projects like dishcloths often don’t need it, while lace, garments, and anything with edges that curl should definitely be blocked. When in doubt, a light spray blocking rarely hurts.
Can I block acrylic yarn projects?
Yes! Acrylic responds well to steam blocking, and you can even “kill” it with heat to make it softer and more drapey. Use medium heat and be careful not to melt the fibers. Spray blocking also works well for acrylic projects that just need edges smoothed out.
How long does blocking take?
Spray blocking can be done in 2-4 hours, steam blocking takes about the same time, but wet blocking requires 12-48 hours depending on yarn weight and humidity. Plan accordingly – don’t start wet blocking a gift the night before you need to give it!
Will blocking change the size of my project significantly?
It can, especially with natural fibers and lace patterns. Wool can stretch quite a bit when wet, and lace patterns often grow dramatically when blocked properly. This is why checking gauge and blocking swatches is so important for fitted garments.
What’s the difference between blocking wires and pins?
Blocking wires create perfectly straight edges with fewer anchor points, while pins give you more control over curves and individual points. Wires are especially useful for straight edges on shawls and blankets, while pins work better for shaped pieces and detailed lace patterns.
Can I block projects made with cotton yarn?
Absolutely! Cotton responds beautifully to all blocking methods. Wet blocking works particularly well for cotton because it can handle the moisture, and it often softens the fabric nicely. Cotton also holds its blocked shape well once dry.
Should I block before or after seaming garment pieces?
Block individual pieces before seaming to ensure they match your pattern measurements, then do a final light blocking of the completed garment if needed. This approach gives you the best fit and finish, especially important for fitted sweaters.
How do I know if my yarn can handle wet blocking?
Check your yarn label first – it usually indicates appropriate care methods. When in doubt, test on a small swatch. Natural fibers like wool, cotton, and linen generally handle wet blocking well, while some delicate or novelty yarns might need gentler steam or spray blocking.
Blocking really is one of those techniques that separates okay crochet from professional-looking work. Yes, it takes time and patience, but the results are so worth it. That first time you see your lace project transform from a crumpled mess into something magazine-worthy, you’ll understand why experienced crocheters swear by proper blocking.
Start small if you’re nervous about it – try spray blocking a simple dishcloth or steam blocking a swatch. Once you see the difference it makes, you’ll find yourself planning blocking time into every project. Your future self will thank you when people start asking if you bought that beautiful shawl at a boutique instead of making it yourself.
Happy blocking, and remember – like most things in crochet, it gets easier and faster with practice. Soon you’ll be pinning out projects like a pro and wondering why you waited so long to start.